Thursday, July 21, 2011

Turning a Hoodie into a Pillowcase

When I came home from college this summer, I discovered an interesting thing about myself. I own over 30 hoodies... most of which I have a reason for not wearing.

There is the hoodie I got from a concert that got washed with a pen and is now covered in ink.

Or the mass amount of hoodies I have from my high school, much less cool to wear when you are in college.

I wanted to get these hoodies out of my closet, but some of them I couldn't bear to give away. I decided to try and make cute throw pillows to keep them around.

So here's how I made adorable hoodie pillows for my sister and my college apartments.

Hoodie Pillows
 Needed:
  • A favorite hoodie that can no longer be worn
  • A sewing machine
  • Thread matching the hoodie, or in a cute contrasting color
  • A pair of scissors
  • A seam ripper
  • A standard bed pillow
Action plan:
  1. Use the seam ripper to remove the hood from the rest of the sweatshirt. This is a very important set to do first, because it allows you to easily insert and remove the pillow from the sweatshirt.
  2. I like to hem the neck of the sweatshirt after I take the hood off, but if you would prefer an unfinished hem, you can skip this step.
  3. Then, turn the sweatshirt inside out and sew the bottom of the sweatshirt, about a 1/4 inch from the bottom, on the elastic.
  4. Trim off the sleeves off the hoodie, making sure to leave about an inch of sleeve in tact. This makes the side seams easier to work. The sleeves just get in the way.
  5. Slip the pillow into the hoodie, and pin straight sides around the pillow, making sure the pouch of the hoodie, and any beloved symbols on the front of the hoodie are centered. Depending on the size of the hoodie, you may need to sew the entire length of the hoodie, or just sew up the arm holes. This hoodie is from my younger days, and it was somewhere in the middle. Just make sure you fit the hoodie to your pillow.

  6.  Slip the pillow out and sew the side seams.

  7. Trim the excess off of the side seams, turn the now pillowcase right side out, slip the pillow inside, and see if you like it. I love them just like this, with an open top. If you don't like this look, there are a few options you have. 
8. You can attach fabric from the extra sleeve or hood fabric, and sew that to the inside from of the   neckline, giving you something to tuck over the pillow, creating a more solid pillowcase. Or, you can add buttons to the neck, to keep the pillowcase close.

Enjoy! These are a great way to save your old hoodies, and they give you a great place to store the remote on the couch.

Sunday, July 10, 2011

Yemeni Tea

I am lucky enough to have close family friends who come an visit occasionally from far off lands, bringing the wind of a different culture into my stale everyday life.

On this visit, I was able to learn how to make Yemeni tea. My mother has been raving about this tea for years and I had never been in a position to try any. As an avid tea drinker, I was always extremely curious.

This trip, I volunteered to help make it, with the very selfish motive of wanting to blog about it. When we finished the tea and I was finally able to taste some, I was pleasantly surprised. It was smokey and sweet, much like the chai tea I indulge in from Starbucks, yet with flavors I do believe I had never experienced before. I did tweak the recipe some on my first solo attempt, and am very pleased with the results. (I added cinnamon, ok? It just didn't seem right without cinnamon.)

This will definitely be a staple on cold mornings when I am back at school.

Yemeni Tea

Start with 5 cups of water in a large pot.

Add to the water:
  •  3 teaspoons Cardamom
  • 1 teaspoon Nutmeg (I grated mine fresh, because I am at home, but at school, you can be this will be pre-ground as well. 
  • 1 Cinnamon stick or 1 teaspoon ground Cinnamon
  • 6 whole Cloves or 1 teaspoon ground Cloves   
  • 3 tablespoons Sugar
Bring this mixture to a boil, at around medium to medium high heat. This will give the spices time to mingle with each other before adding the tea.


Once boiling, add 5 black tea bags. I used Liptons, so I know that works well, but I have grand plans to mess around with more exotic tea. Let me know if you discover anything awesome. 


Allow the tea to steep in the boiling water, on the HEAT, for 5-10 minutes. If you rush this step, you will regret it later, when the final product is weak. 


Once the tea has boiled, add a can of Evaporated Milk. 


Then let this mixture boil for another 2 minutes.


Then comes the hardest part of this recipe. You must let everything sit, covered if you can, for about 10 minutes. The tea needs to finish brewing, the spices need to finish making everything spicy, and the milk needs to get over it's separation anxiety issues from the can. 10 minutes. Full minutes. 

After this, strain out the cloves, cinnamon stick, and tea bags.

The end result is a cup of tea that will put any Starbucks to shame. Enjoy!


Friday, July 1, 2011

Hogwarts Knit Skirt

As a child of the '90s, I grew up reading tales about Harry Potter and his band of merry men. What can I say, I was hooked. Now, many years have passed since I first began the children's series, and I still remain loyal to the films.

The Harry Potter movies and I had a long standing tradition, I would wait for hours at the theater (the past few years in full uniform) waiting with great anticipation to view the next piece of the story.

Around 3 AM, I would then stumble back to my car, robes shoved haphazardly into my bag, thoroughly disappointed with all they had left out of the story.

Year after year, this ordeal took place, until the 7th movie. While it may not have completely covered the book, I was happy with it. I didn't feel the horrible disappointment as with the other movies. Hence, my anticipation for the second installment grew.

My costume would have to be perfect for such a grand event. Since the gray uniform skirt I originally wore was outgrown year earlier, I was in the market for another skirt.

I am in college, so this would have to be a cute, gray skirt, to the knee, hopefully that I would want to wear without the costume, for cheap. This was not happening.

Since I am now on summer vacation, I do have a great deal of time on my hands. I wanted to knit the perfect Hogwarts skirt. After many afternoons combing Ravelry, I could not find the skirt I wanted. I found 2 similar skirts and decided to cut, paste, and ad lib until I got what I wanted.


Here are links to the 2 patterns that I manhandled to get my skirt.
Little Flirt Skirt
and
Flirty Skirty

Perfect "For Me" Hogwarts Skirt

Cast on 180 on size 7 circulars (around size 12, it was too big on me)


Join in the round and place marker, and knit for 12 inches. (If you are short, knit less, if you are tall, knit more. Just keep it as long as you want, planing for 3 inches of pleats.


Start the eyelet boarder:
Round 1, 3, 5, and 7: Purl
Round 2 and 6 : Knit
Round 4: *Yarn over, K2together* Repeat until end of round.


Start pleats:
Rounds 1–7: *K9, p1* Repeat until end of round.
Round 8: *K9, p1f&b* Repeat until end of round.
Rounds 9–13: *K9, p2* Repeat until end of round.
Round 14: *K9, p1, p1f&b* Repeat until end of round.
Rounds 15–19: *K9, p3* Repeat until end of round.
Round 20: *K9, p1, p1f&b, p1* Repeat until end of round.
Rounds 21–25: *K9, p4* Repeat until end of round.

Bind off all stitches.


Most importantly, TRY ON THE SKIRT NOW.


Then, pick up 180 stitches from the cast on row, and *K2, P2* for 2 inches.

Decrease at the cast on evenly as may stitches as necessary to insure the skirt won't fall off your hips. I failed at this endeavor and has to take the waistband in on my sewing machine. But it is much better to use the waistband decreases to ensure a fitting skirt.


Tada! A skirt fit for Hogwarts, and after the movie is over, a cute pair of colorful tights. ;)

I'll try to post some pictures of the whole outifit after the premiere :)

Monday, June 13, 2011

It's Good to Be Home

After my sucktastical roommates moved out, then dropped in to do laundry several days later, I am very happy that I am finally in a place where they don't have keys. Home from college, for at least 6 weeks.

I have no idea what I'm doing. No plans. No homework. No job.

I had a need for something familiar, something that makes this place, away from school and the life I am working on building for myself, feel more like I belong.

For me, that would be Burritos to Go. The best place to grab lunch when I was in high school, the place the serves the best chicken enchiladas I've ever had, and the place where the owner still remembers every regular, plus their order.

Next time any of you are in the Colorado area, be sure to visit this tiny little carry-out Mexican food gem. Maybe, it will help you feel a little closer to home too.

(Sorry the picture is so poor. I haven't unpacked my camera, so this was taken from my phone.)

Monday, March 7, 2011

Blueberry Cupcake Pies

Winter quarter at school managed to come and go without enough time in my schedule for a blog post.

Than Spring break showed up last week, and with a trip home with the boyfriend, and a major cold, I once again couldn't blog.

Here we are at Week 1 of Spring quarter. A new hope at the end of a long hard winter. In celebration of this, I have decided to show my own attempts at cupcake sized pies. I was inspired by not martha's blog where she made little pies in jars.

I'm in college. I wanted little pies. And I had no jars. So, the internet has exploded with people making cupcake sizes pies, and I tried my hand at it..

I will warn you before you try things out, eating them makes you feel like a giant, and that is addicting.

Blueberry Cupcake Pies


I started by making a batch of my sugar cookie dough. I have never been a fan of fruit pies because they are either soggy on the bottom, or the crust isn't sweet enough on its own. I wanted a strong pie crust, so see my post, A Nice Change of Scenery for the recipe.

I made a batch of the sugar cookie dough...

then cut out circles with a cup. My cups are very large, so I ended up with circles with about a 4 inch diameter, which was perfect for using as the bottom of my crusts.

I pushed these into my muffin tin, after spraying the pan with non-stick spary and baked for 375 degrees for 3 minutes, so when I added the blueberry goodness they didn't get soggy.
I filled these barely baked pie shells full of blueberry filling, (recipe below) and used the scraps from cutting out the crusts to make some cute top crusts.

I sprinkled the tops of the pies with sugar, then the pies were then bakes for 15-20 minutes, until the tops were golden brown, and the filling was bubbling.

Blueberry Filling

  • 1 and a half cup sugar
  • 2 cups of frozen blueberry
  • 2 tablespoons of cornstarch
  • 2 tablespoons of apple juice
  • Half a lemon's worth of lemon juice, about 3 tablespoons
  • Half a lemon's worth of lemon zest

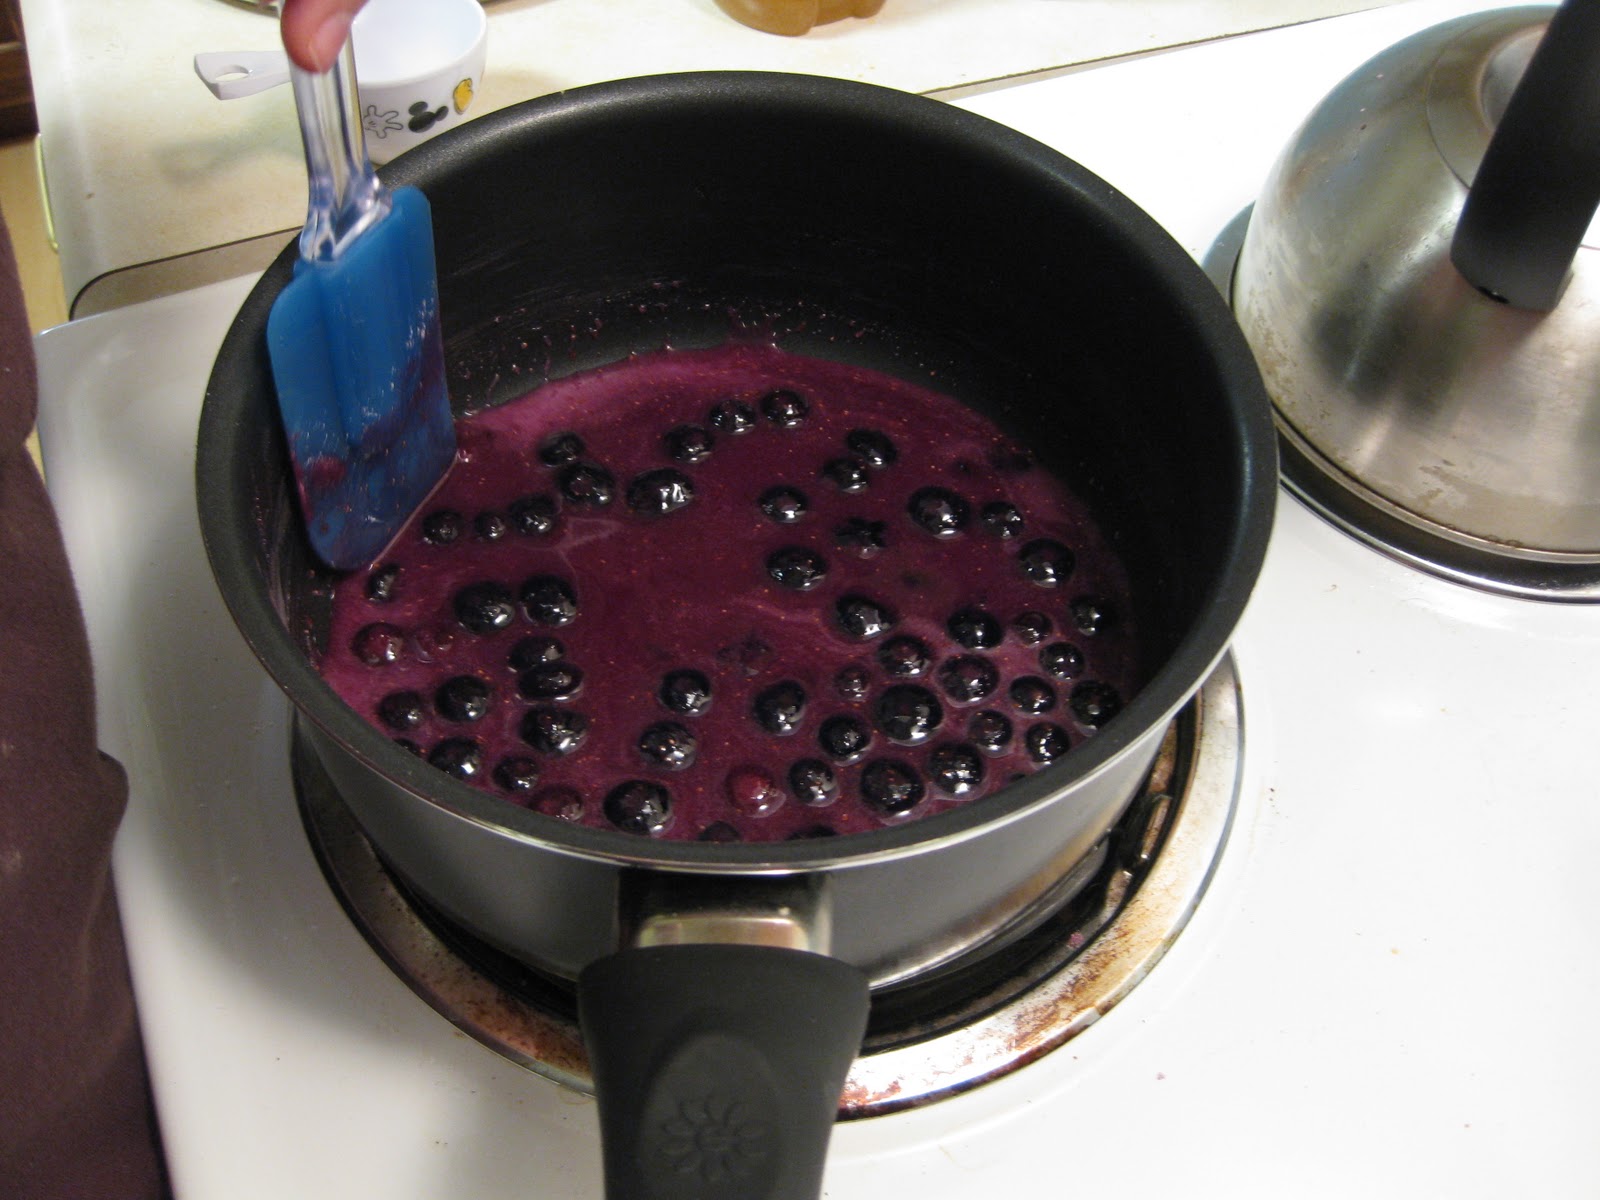
  1. Heat sugar and blueberries in a non-stick pot until the sugar melts completely. It will look like it will never happen. But wait it out. And do not raise the heat of the stove over medium. Molten sugar burns are not fun...
  2. Cook the sugar and blueberry mixture for 2 minutes, then mix the remaining ingredients. Mix and keep heating until the the mixture becomes one cohesive filling.

3.  Let the filling cool and thicken for about 5 minutes until spooning into prepared pie shells and baking.