Showing posts with label Recipes. Show all posts

Wednesday, January 23, 2013

Citrus Blueberry Green Smoothie


I have no time. Yet I also probably have bronchitis, so I better start making some time.

The fast paced nature of college has led my eating habits down a very bad path.

I've been trying to combat this. I cook, I try to eat healthy.

But, pizza always seems to be hovering over me like a dark cloud. Not that there is anything wrong with pizza. I love pizza.

But I feel like everyone in college needs Cookie Monster to drop by and remind them that pizza is a sometimes food.

Maybe that's the solution.

All of this thinking about nutrition and my new Christmas blender has gotten me looking into green smoothies.

"Try a green smoothie!" the internet exclaims. "You can't taste the spinach!"

So, I places some of the frozen spinach we had in the freezer in the microwave to steam it, then I let it cool.

After adding greek yogurt, berries, and a tangelo, I could still taste the spinach. So could Code Boyfriend. It kind of coated our tongues in a vegetable, dirt taste. 

Needless to say, that was thrown out.

But I wanted to try again.

So, I tried celery. Hallelujah! 

A vegetable I could mostly cover up in a smoothie. If you think about it, celery has an almost fruity taste anyways. 

If you can get past the stringy texture. But my emersion blender made quick work of that! 

So here it is, a "green" smoothie that I can actually drink. I hope you can to.

No offense to anyone who likes spinach in their smoothies. I'm trying again with fresh, baby spinach  Wish me luck.


Citrus Blueberry "Green" Smoothie
  • 2 Small Stalks of Celery
  • 3/4 of a Cup of Frozen Blueberries
  • 1/2 of a Cup of Vanilla Greek Yogurt (Mine is non-fat, but go with what you feel)
  • 1 Whole Tangelo, minus the skin and seeds
  • 4 Ice Cubes, not necessary, but nice for the texture

Combine all ingredients in your blender carafe, mine is just a large cup.

I have no idea why neither the yogurt nor the ice is in this picture... Derp.


Blend until smooth and pour into a pretty glass. I felt fancy so I made myself a heart garnish out of the tangelo peel. 

Friday, January 18, 2013

Loaded Potato Pancakes

I was scrolling through pinterest when I was struck by a fantastic idea.

You know all those hash brown recipes? Why don't they have bacon in them??? What if you loaded hashbrowns like you load baked potatoes?

I know, I know, stroke of pure genesis. I haven't really been this inspired by food in a while.

School kind of kicks the inspiration right out of you.

School is really hard, you know? Senior-itis is an strange thing, but I think mine stems from no longer feeling like I belong on this campus. Now I just feel as if I am waiting for my life to start.

I think college is a time to figure out who you are, but I'm still trying to figure out what to do here once you find out.

I'm a knitting, a baker, and a scientist who loves Basset Hounds, mexican food, and nights in with Code Boyfriend. So what am I waiting for?

While I ponder that question, here is a college recipe. Hopefully it will fit into the rest of my life too.

Loaded Potato Pancakes
Feeds 3 hungry college students
  • 2 Cups of Frozen Hash Browns
  • 1 Cup of Cheddar Cheese
  • 1 Cup of Sour Cream
  • 2 Eggs
  • 4 Strips of Bacon, Crumbled
  • Salt and pepper to taste

Mix the hashbrowns, cheese, eggs, and sour cream in a bowl. Salt and pepper.

Cook bacon crispy, and crumble into the potato mixture. (No idea why this looks like egg salad)

Heat a nonstick skillet over medium heat and form a nice large "pancake" on the bottom of your pan.


Cook over medium heat for about 4 minutes until the underside is golden brown and delicious. Flip, and repeat.

Due to running late to knitting club, and the speed at which these potato pancakes were devoured, I didn't get a pretty plate picture. Sorry about that.

I do highly recommend putting chives in this dish. I would have but Code Boyfriend doesn't eat onion. They would taste exactly like a loaded baked potato if you did.

Roommate informed me that if I made these every night, she would be a happy camper. Great reviews over all, you should try this recipe.

Sunday, January 13, 2013

Cran-Blueberry Citrus Smoothie

What are you doing to me, Rochester??

Isn't it hard enough to stay focused on studying for my Biochem exam tomorrow in the dead of winter? Now you have to go and dangle spring in front of my face?

If you haven't been paying attention, today the weather in Rochester, NY was supposed to hit 68 degrees.

The past few weeks it's barely been above freezing and I've been bundled up to my eyebrows with a down coat and flannel lined pants.

For no reason at all, today the temperature skyrocketed, and this was the beautiful spring view out my back window.

January 13th... are you freaking kidding me?

In response to everything I've come to understand about the unforgiving, unyielding East coast winters being thrown out the window, I decided to take a little siesta from my homework and celebrate by using my new blender.

And something wonderful happened. A nutritious, thick, fruit smoothie from only things that were lying around my house.

I will say that Code Boyfriend thought the mixture of the cranberry and the citrus juice made the smoothie a little to tart for him, but I thought it was extremely balanced with the creaminess of the yogurt. If you would like a more mellow flavor, substitute apple juice for the cranberry.

Cran-Blueberry Citrus Smoothie
Makes 1 serving

  • 1 - 6 oz container of Greek Yogurt - I used Wegman's Vanilla
  • 1/2 Cup of Frozen Blueberries
  • The Juice from 1 Tangelo, you can easily substitute lemon, lime, orange, grapefruit, or any other citrus you have, but I had tangelos that were about to go bad.
  • 1/4 Cup of Real Cranberry Juice
  • 4 Ice Cubes

Layer all of your ingredients into a large cup, or in a blender.

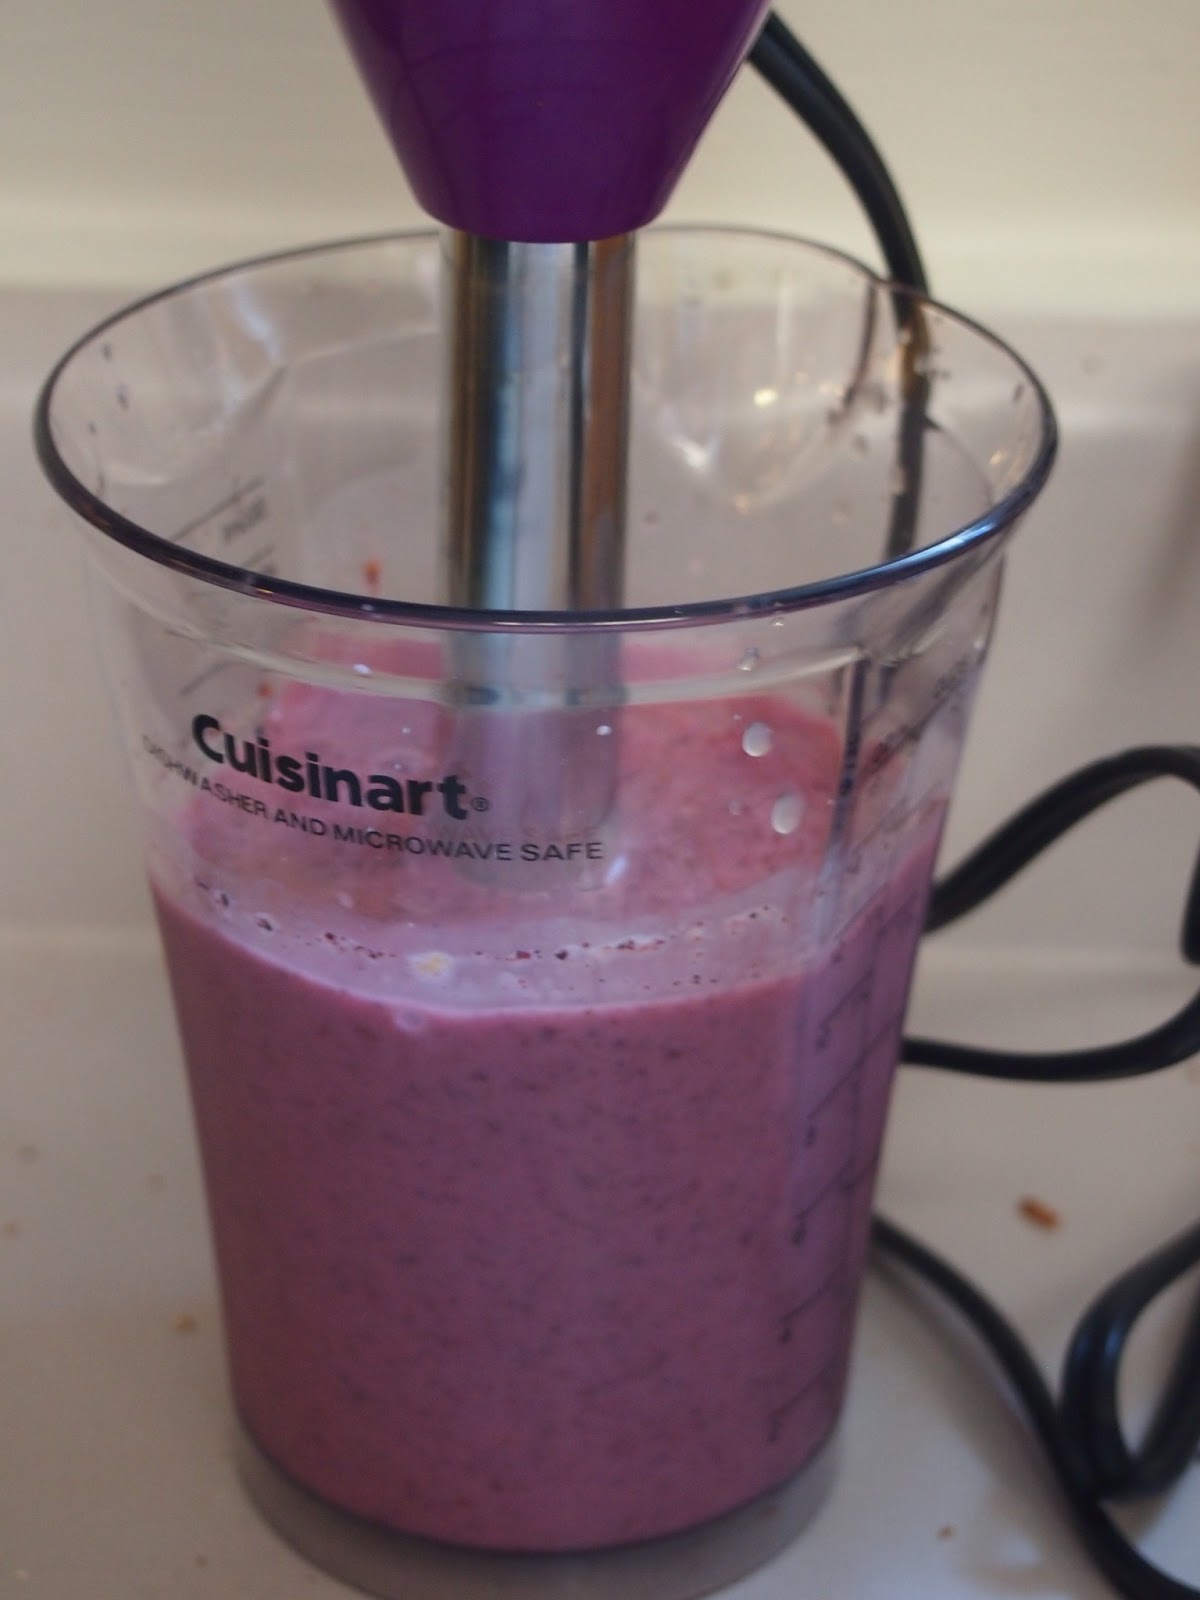
I got an awesome new Cuisinart emersion blender for Christmas  This is the cup that comes with that because I have no other glasses wide enough to fit the mouth of the blender.


Blend until everything is homogenous, which took me about 45 seconds. (Please notice how my blueberry smoothie matches my epic purple blender)

Pour into a fancy cocktail glass, and garnish with a slice of whatever citrus fruit gave its life for your smoothie.


I felt the need to add a bendy straw. Your mileage may very, but what is a smoothie without a bendy straw? 

Saturday, January 12, 2013

Buttermilk Waffles

Saturday mornings are usually pretty sleepy around here.

Sleep late, eat breakfast at the table like humans, and drink coffee slowly out of a real cup and not a travel mug.

This is in stark contrast from school mornings, where I inhale a bowl of oatmeal while packing my backpack and drink coffee while driving to school.

So after a late night of Settler's of Catan and alcohol, everyone slept in. Once I got up, I got this idea in my head that I wanted to make waffles.

I had some leftover buttermilk from trying to make Buffalo Cauliflower... that recipe needs a little more tweaking before I share it.


So buttermilk waffles it is!

Buttermilk Waffles

Adapted from Smitten Kitchen
  • 2 Cups of Flour
  • 1/4 Teaspoon Salt
  • 1 and 1/2 Teaspoon Baking Soda
  • 2 Tablespoons of Sugar
  • 2 Cups of Buttermilk
  • 4 Tablespoons of Butter, melted
  • 2 Eggs, separated
Combine flour, salt, baking soda, and sugar in a large bowl.

Combine buttermilk, melted butter, and egg yolks.

Gently combine the wet and dry ingredients, stirring until just combined.

In a separate clean bowl, whip the egg whites into soft peaks. This means that when you remover the beater or whisk and turn it upside down, a small mound will flop over the top.

Softly fold the whipped egg whites into the batter.

Pour 1/4 to 1/2 a cup of batter, depending on the size of the iron, into a preheated waffle iron. Make sure to remember to oil the waffle iron! I use Pam for this.

Cook for 3-7 minutes, depending on how hot your waffle iron gets. I usually need to be closer to 7 minutes, with my Oster Waffle Iron. 


It's not fancy, but it makes decent waffles.

I always move finished waffles directly onto the rack in a warm over so they stay crispy as I finish the rest of the waffles.

My first batch of waffles in this iron was a yeasted recipe, which were awesome, but these cook way faster and don't have to sit out over night like the yeast recipes do.

This is a solid, no prep, waffle recipe.

Monday, January 7, 2013

Carrot Cake Cookies

Merry Christmas and Happy New Year!

I had a very nice Christmas break. Two weeks was not quite long enough to recharge my school batteries, but it was nice to remember what sleep feels like.

It's back to the college grind today, but it's very unsettling to think that I only have 5 months left.

Code Boyfriend and I have huge plans for after graduation, but more on that later.

Right now, I want to show you pictures from my awesome new camera (hooray for Christmas presents!), as well as the cookies I made for the Knitting Club e-board.

I got so busy before break that no one got any cookies! I had to fix that. So now, carrot cake cookies.

They're soft, and cake-y. Just like a carrot cake muffin. But only the top, which is everyone's favorite part anyways.

Doesn't that look good?

I'm so excited to dig in to them at the meeting tonight.


Carrot Cake Cookies
 Adapted from LandOLakes
  • 1 Cup of Butter, softened
  • 3/4 Cup of Brown Sugar
  • 3/4 Cup of White Sugar
  • 2 Eggs
  • 2 and 1/2 Cups of Flour
  • 1 Teaspoon Baking Soda
  • 2 Teaspoons of Ground Cinnamon
  • 1/2 Teaspoon Salt
  • 2 Cups of Shredded Carrots (About 4 Carrots)
Cream together butter and both sugars until fluffy.
Slowly beat in both eggs.
Beat in flour, baking soda, salt, and cinnamon.
Finally, gently mix in carrots.

Place about 2 tablespoons of dough about 2 inches on a baking sheet, lined with parchment or a silicon baking mat. (Please note my awesome new silicon baking mats!)

Bake at 350 degrees for 12 minutes. They won't stay soft if you overcook them. And who wants crunchy carrot cake??


Frost with cream cheese frosting and enjoy!

Saturday, December 22, 2012

The Most Moist Chocolate Cake

3 years ago, when Code Boyfriend's birthday was coming up, I asked him what kind of cake he wanted.

He said he wanted an extremely moist, dense, chocolate cake.

So, I scoured the internet for the most moist chocolate cake and I think I've found it. After making it once, I have never felt the need to look for another chocolate cake.

I've made this recipe at least 6 times, including as Code Boyfriend's birthday cake three years running. He never wants anything else.

I will give you fair warning. Frosting this cake will make you want to cry. Making the cake so moist makes it nearly impossible to frost without getting crumbs in the frosting.

You'll scream, you'll cry, and then... you'll taste it. And all that hatred will go away. 

I think this cake would be great frosted with whipped cream, allowing the chocolate flavor to stand for itself. Code Boyfriend has a very strong attachment to vanilla butter cream.

If you are going to frost with butter cream, make sure it's very soft butter cream. Mine was very stiff and it wouldn't go on nicely. After 45 minutes of struggling with it, I swore I'd use whipped cream next year.

Adapted from Tricia's Kitchen.


The World's Most Moist Chocolate Cake

  • 2 Cups of Sugar
  • 1 Cup of Vegetable Oil
  • 2 Eggs
  • 1 Cup of Milk 
  • 1 Cup of Hot Coffee
  • 2 Teaspoons of Vanilla Extract
  • 3/4 of a Cup of Cocoa Powder  
  • 2 Cups of Flour
  • 2 Tablespoons of Corn Starch
  • 1 Teaspoon of Salt
  • 1 Teaspoon of Baking Powder
  • 2 Teaspoons of Baking Soda
  • 1/2 Cup of Sour Cream
 Combine sugar and oil in a mixer. Add 2 eggs slowly. Add milk, coffee, and vanilla.

Combine flour, cocoa powder, corn starch, salt, baking powder, and baking soda in a separate bowl.

Slowly, incorporate the dry ingredients into the wet ones.

Mix in the sour cream. Make sure to do this completely, or you will have streaks of white in your chocolate cake. 

This batter will be extremely watery. The first time I made this cake, I thought it was never going to bake up. But it does.

Pour into 2-9 inch round cake pans lined with parchment paper.

Bake in a 325 degree oven for 40-50 minutes, or until a toothpick comes out clear.

Seriously, try this cake! You'll never go back!   

Friday, November 30, 2012

Quick Buffalo Chicken Wraps

This is one of my favorite dinners to make when I am out of time.

I also love to take this for lunch. I bake the buffalo chicken strips in the morning before I leave, then wrap them in aluminum foil. I take a small container of ranch and a tortilla.

I put them all together at lunchtime.

It's so wonderful and filling!

Buffalo Chicken Wrap
  • 5 Buffalo Chicken Nuggets, I use Wegmans, but I'm sure any buffalo strips will work.
  • 2 Tablespoons of Ranch Dressing
  • 2 Leaves of Romaine
  • 1 Multi-grain Tortilla
Oven bake the buffalo chicken strips extra crispy.

Wrap with all the fixin's in a large muti-grain tortilla.

I hope this helps you on a busy night!

Sunday, November 25, 2012

Pesto Panini Bread

When I go back to Colorado, one of the foods I look forward to is a Turkey Pesto Ciabatta sandwich from Mimi's Cafe.

This time, I ordered pancakes when we went to Mimi's. Still good, but not the sandwich I was craving.

I also feel like having school start the Monday after Thanksgiving limits the amount of leftovers I can consume.

So, turkey was on sale at Wegmans, and I picked up a nice little turkey breast.

I wanted to recreate the Turkey Pesto Ciabatta, but did you know ciabatta has to rise overnight?

I didn't. Not enough foresight for that to happen.

So I switched to a panini idea. I wanted to make the bread.

I couldn't find a recipe for bread to use in panini making. I was disappointed.

The Pioneer Woman has never failed me, so I altered the recipe for Blooming Bread from her Pastor.

This bread ends up crispy and delicious, perfect for making into a panini.

Pesto Panini Bread
  • 4 Cups of All Purpose Flour
  • 1 Teaspoon Active Dry Yeast
  • 1 Stick of Butter, melted
  • 1 Tablespoon of Pesto
  • 2 Teaspoons of Salt
  • 1 Cup of Lukewarm Water
Combine the warm water and yeast in the bowl of a stand mixer. Allow to sit for 5 minutes, activating the yeast.

Add the rest of the indgredients and knead for 10 minutes. My mixer, Vera, didn't have any problems with this, but if yours starts to heat up, give it a rest for a few minutes or finish by hand.
Move the dough to a large cast iron skillet and allow to rise for 1 hour. I placed mine on top of the oven I was using to roast a turkey.

Once the dough has doubled in size, it can be moved into a 425 degree oven for 15 minutes, covered in aluminum foil, or with any oven-safe lid. We want to control the browning.

Remove the cover an allow to bake for another 15 minutes.
Cut the loaf into sixths and enjoy filling this with whatever strikes your fancy.

I filled this loaf with tomato, pesto, mayo, turkey and mozzarella cheese. They were amazing!

I pressed them in our little George Foreman grill. No panini maker necessary! 2 cast iron pans work just as well.

Saturday, November 24, 2012

Simple Chicken Stir Fry

I don't know about you all, but I am still feeling full from Thanksgiving.

Code Boyfriend and I have been trying to eat a little lighter since returning home from our vacation.

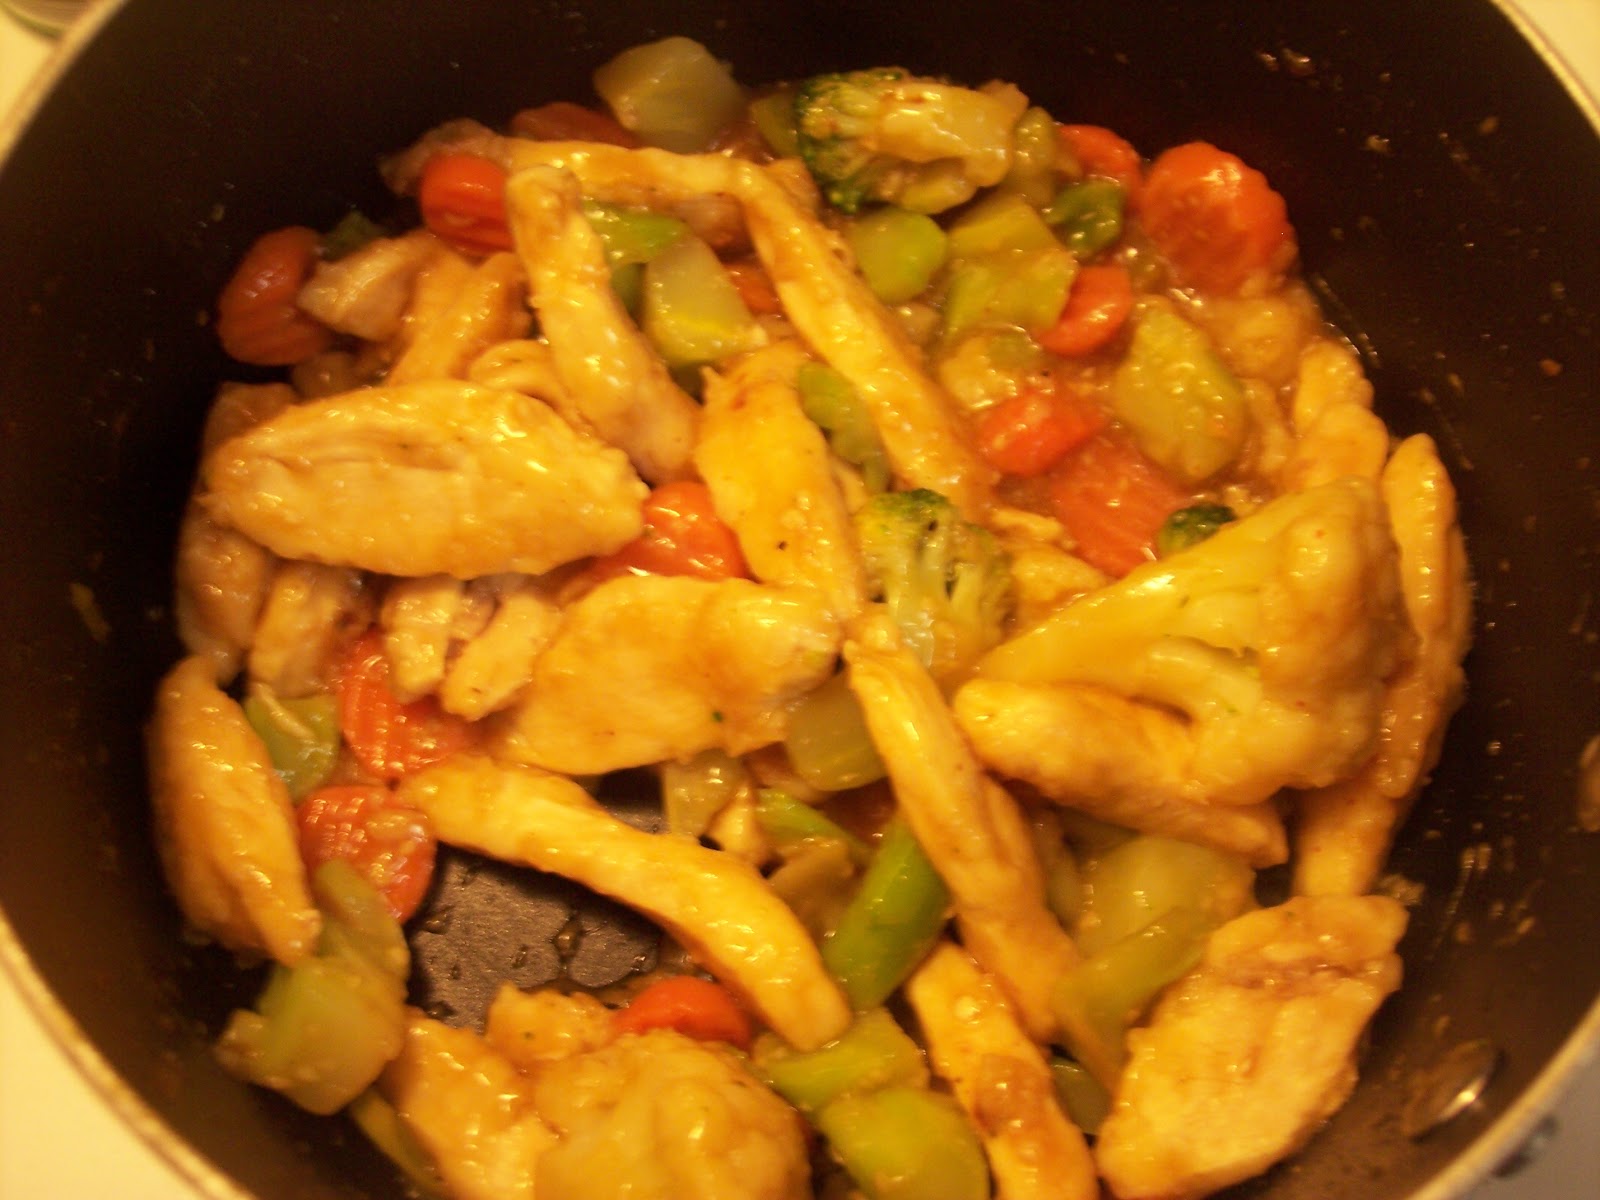
So tonight, I made a very simple chicken stir fry with brown rice.


Nothing spectacular today. We didn't eat breakfast and grabbed a quick lunch at Wegmans before we did our shopping.

It is full of veggies and easy to switch up with whatever veggies you may have on hand.
Chicken Stir Fry

  • 1 Chicken Breast, cut into strips
  • 1 Clove of Garlic
  • 1 Cup of Frozen Vegetable, I used Broccoli, Cauliflower and Carrots
  • 3 Tablespoons of Teriyaki Sauce -- The Wegman's Teriyaki sauce is very good
  • Olive Oil for the pan
  • 2 Tablespoons of Corn Starch
Coat the strips of chicken with the corn starch and place in a hot pan with enough olive oil in the bottom to prevent sticking. I used a non-stick pan, so I only needed a tablespoon or so.

Allow the chicken strips to brown on one side, almost cooking all the way through undisturbed. This took my chicken about 5 minutes. I used this time to make instant brown rice.

 After the chicken is mostly cooked, add the garlic, frozen veggies, and teriyaki sauce.

Allow the frozen vegetables to cook, about 7 minutes.

Serve over rice, noodles, or whatever strikes your fancy. I do like to serve with rooster sauce. I like the kick.

Friday, November 23, 2012

Blueberry Pull Apart Bread

Happy Thanksgiving everyone!


I feel like the meals around Thanksgiving dinner always get ignored. No one has ham on Thanksgiving eve like Christmas eve. Nor are there Pinterest boards filled with ideas for Thanksgiving breakfasts.

So here is an idea.
It worked out great today. It finished just as my mom finished prepping the turkey to go in the oven.

I also made the dough the night before. I should have also filled and stacked the bread before I went to bed and let it do it's final rise in the fridge overnight.

If you do it that way, all it takes is 30 minutes to have a delicious warm breakfast.

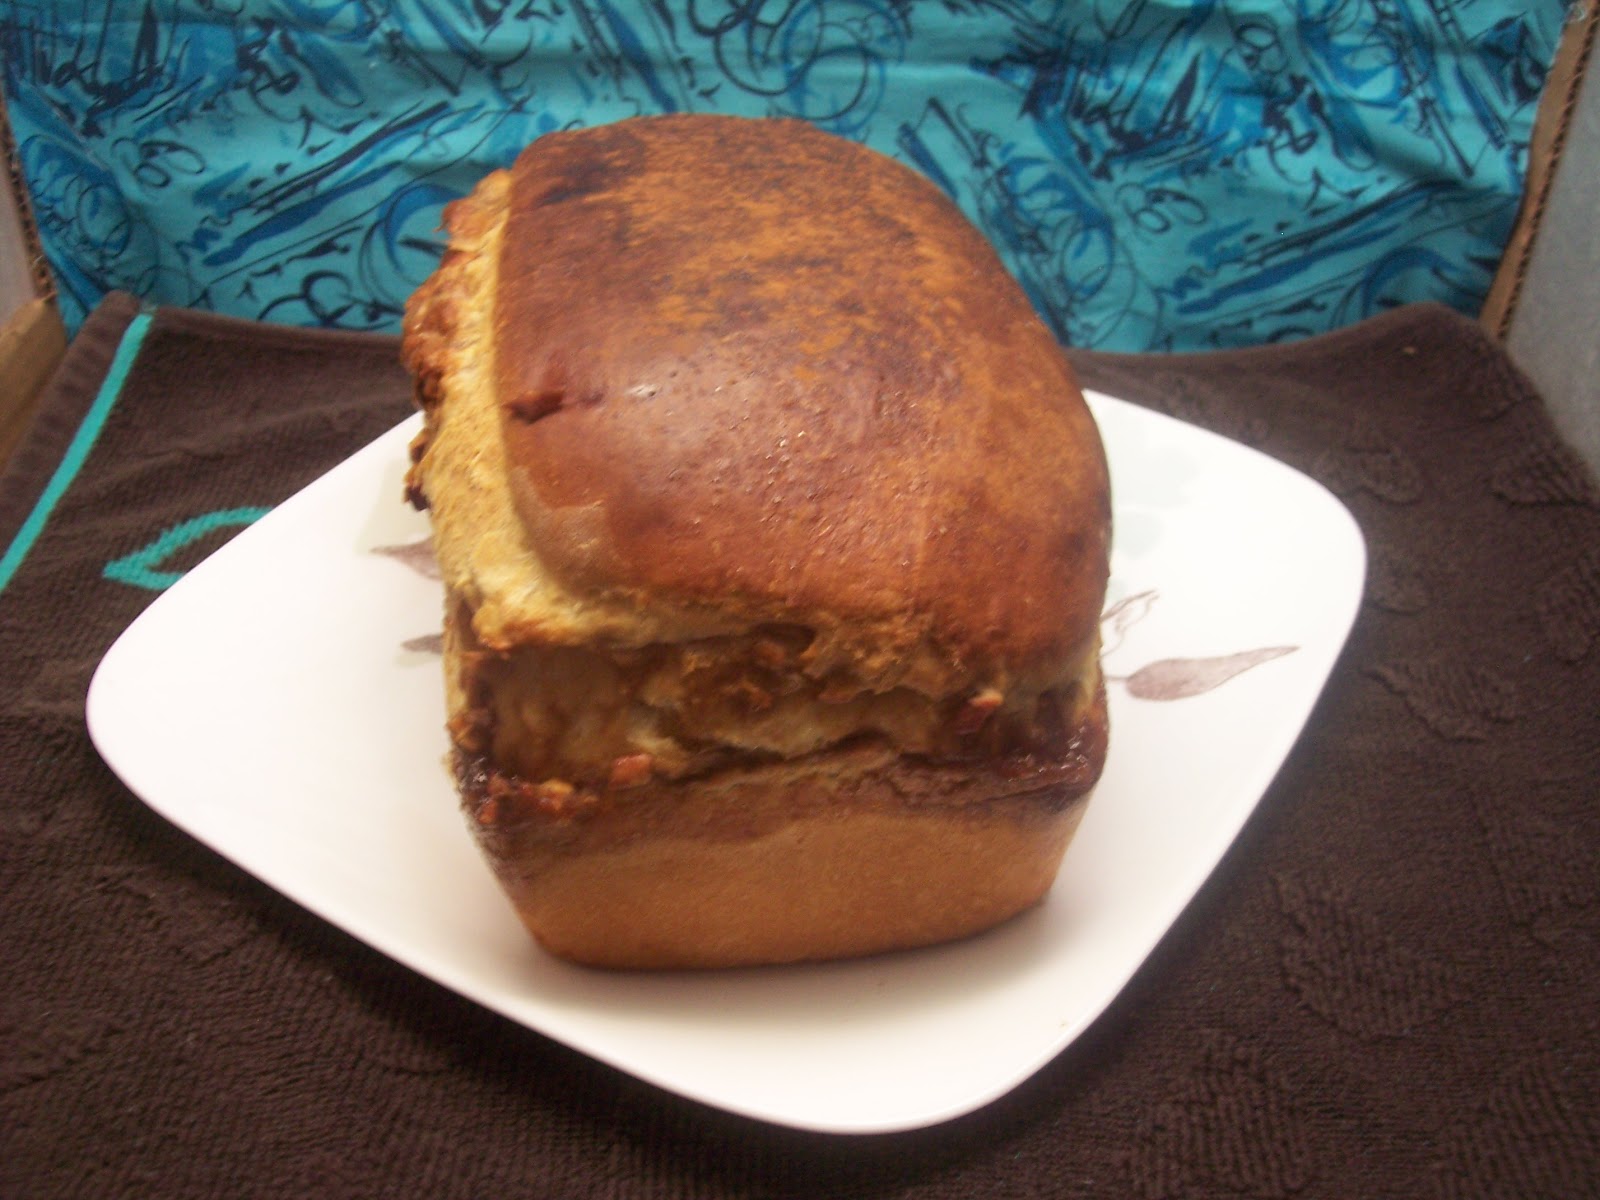
I used the Pioneer Woman's Pull Apart Bread recipe for the dough, then made a blueberry filling.

The one thing I learned today is that blueberries roll... Go figure.

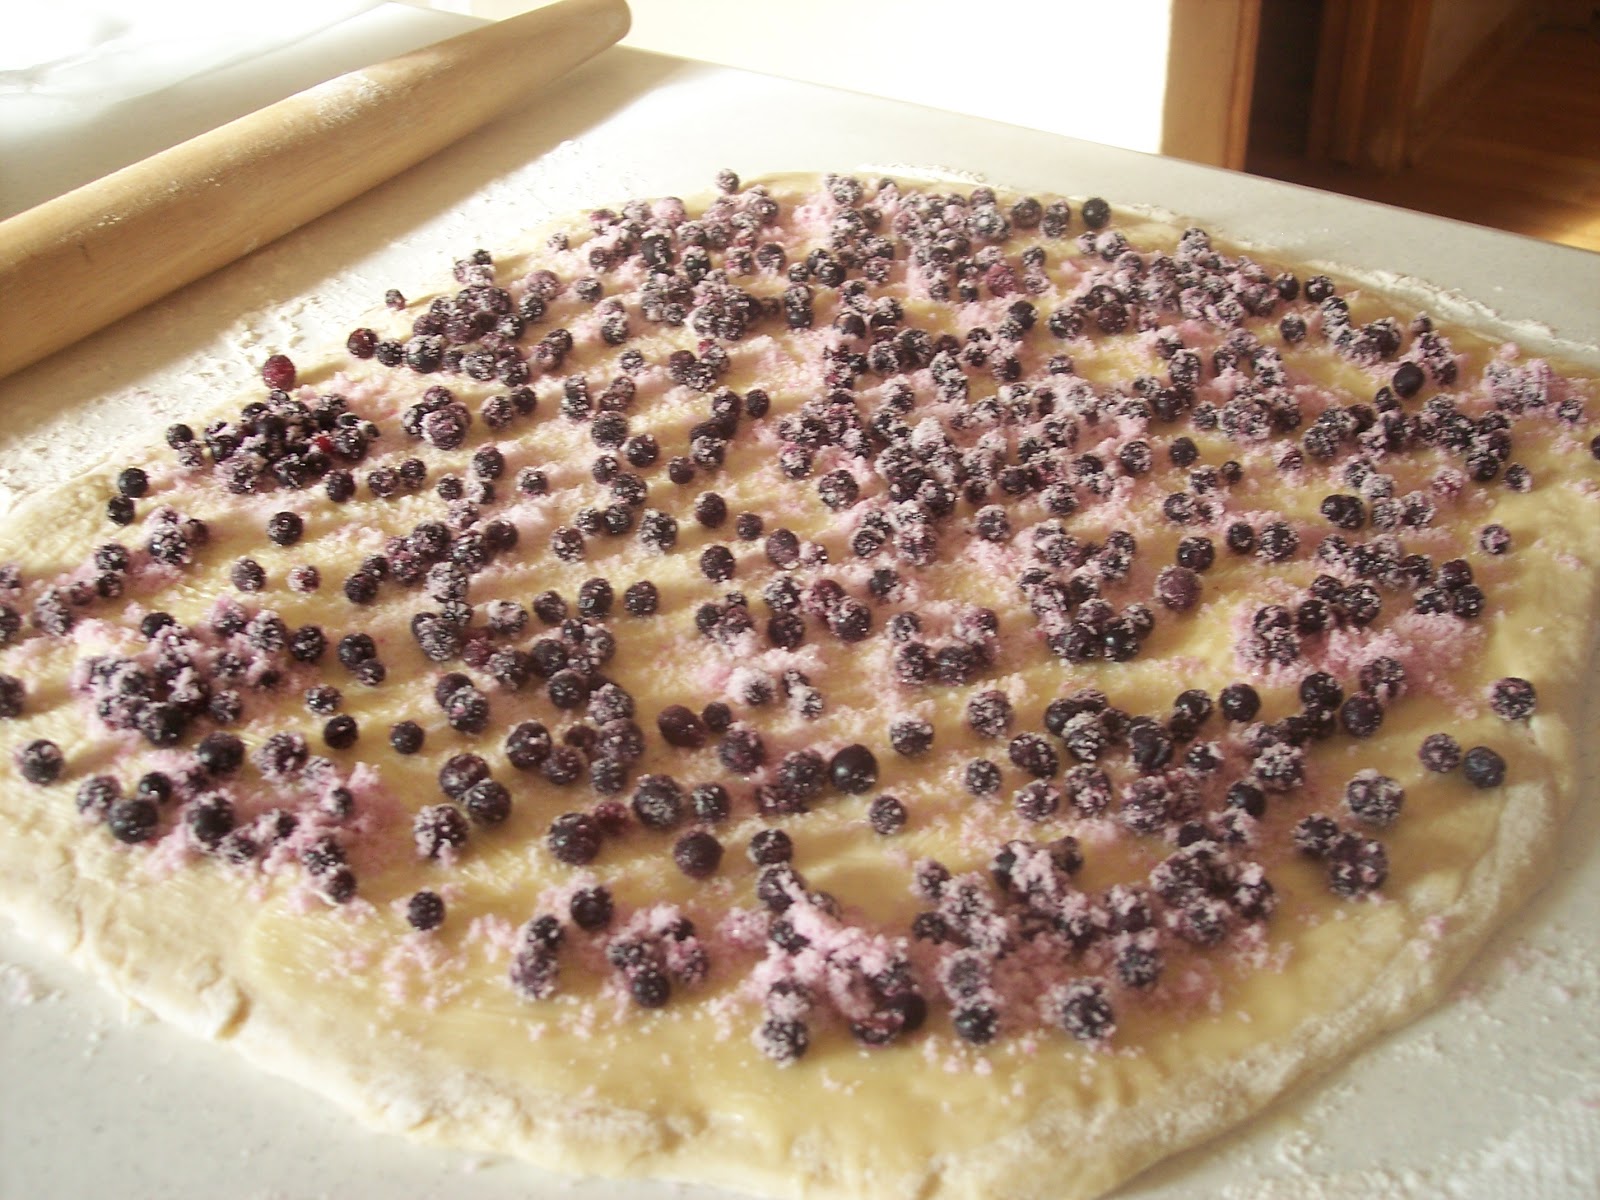
Anyways, I highly recommend mashing the blueberries into the sugar before spreading the filling on to your dough, or cheating by cutting all of the squares and putting the filling in between one by one.

Trust me, round sugar covered blueberries were flying everywhere this morning.


Blueberry Filling for Pull Apart Bread
  • 1/2 Cup of Sugar
  • 1 and a 1/2 Cups of Frozen Blueberries
  • 1 Teaspoon Vanilla
  • 1 Teaspoon Orange Juice, optional
 Mix all of these in a bowl and allow to meld for about 5 minutes before smearing on your dough that has been covered in butter.

For the rest of the bread, I followed the Pioneer Woman's instructions exactly.
 
Be warned, this made a lot of dough. I had to break out 2 mini loaf pans after I filled a large one.


I hope you enjoy the bread!

Wednesday, November 21, 2012

Granola Waffles


When I called home right before Code Boyfriend and I left for Colorado, I got one request. Make enough waffles to fill the freezer until I come back for Christmas.

My mom's favorite are my Granola Waffles. They turned out great. It would have stopped here, but my sister has a nut allergy. I'm sure you can make these waffles with nut-free granola, but I didn't have any. Nor did I feel like making any.

So, I also tried to make my sister Apple Cinnamon Waffles. Those worked out less well. Still edible, but every time I opened the waffle maker, the browned top of the waffle pulled away from the meat of the waffle... They taste good, but look less good.

I'm going to work on that recipe over Christmas break, I'll get back to you with Apple Cinnamon Waffles.

For right now, all I have to share is the Granola Waffle recipe.

Granola Waffles
  • 1 and 1/4 Cups of All Purpose Flour
  • 1 Cup of Granola
  • 1/8 Teaspoon Salt
  • 3 Teaspoons Baking Powder
  •  1 Teaspoon Cinnamon
  • 3 Tablespoons Brown Sugar
  • 1 and 1/2 Cups of Milk
  • 2 Eggs
  • 6 Tablespoons of Butter, melted
  • 1/2 Teaspoon Vanilla
 
Combine flour, granola, salt, baking powder, cinnamon and brown sugar in a large bowl.

In a small bowl, combine milk, eggs, butter, and vanilla.


Combine the wet and dry ingredients until just combined.

Pour about 1/4 a cup of batter into each of the squares of a waffle iron and cook as directed by the waffle iron.

I used the Cuisinart Griddler Waffle Iron plates and they took about 8 minutes at 350 degrees.


If you place them on a baking sheet on some paper towels in the freezer, and then place in a plastic baggie in your freezer, they will reheat just like frozen waffles. So much better though!

Thursday, November 15, 2012

Apple Filled Challah Bread

This is the last one from the Hooks and Needles night, I promise.

Today was exhausting. But tomorrow I am done with this quarter. I just have one more test to get through and then I get to go home for Thanksgiving.

I'm just about to get out of bed and go finish my mother's sweater vest, just you watch....

Ok, maybe later.


Right now I want to give you this bread recipe. It was amazing. Soft and sweet, the apples worked perfectly.

I adapted this pin, because they didn't include a bread recipe. I also forgot to slit the top of the bread. Don't do this... the apples burst out in an escape attempt and get burned to the bottom of your oven.

While I didn't end up having any left over, I would love to try making french toast with this bread... Just a thought.

Apple Filled Challah Bread
  • 1 Cup of Lukewarm water
  • 1 and a 1/2 Teaspoons of Active Dry Yeast
  • 1/2 cup of Honey
  • 2 Tablespoons of Vegetable Oil
  • 1 Egg + 1 Egg for Egg wash
  • 1 and a 1/2 Teaspoons of Salt
  • 4 cups of Flour 
  • 3 Apples, diced
  • 1/4 Brown Sugar
  • 1 Teaspoon Cinnamon
Combine water, yeast, honey, oil, salt and 1 egg in the bowl of a mixer with a dough hook attachment.

Mix just to combine.

Add flour one cup at a time. You can knead in the flour by hand, but I don't want to, and I don't expect you to want to either. It tires out my hands.

Once all 4 cups of flour are incorperated, knead for 8 minutes until the dough is no longer sticky, adding more flour if necessary. I live in the Northeast, where we like to keep the water in the air, so mine took almost 5 cups.

Once the dough is no longer sticky, allow to rest in a warm place until the dough has doubled in size, about 1 hour.

 Once the dough has risen, roll it out into a large rectangle, about a 1/4 inch thick.

Combine apples, brown sugar, and cinnamon in a separate bowl.

Cover your dough rectangle with your apple mixture.

Roll dough around the apples as if you were making cinnamon rolls...mm cinnamon rolls.

Tuck both ends of your roll under the center of the seam, so all parts of your dough seam are inside your loaf.

Place into a greased loaf pan and allow to rise for 30 minutes.

Now, slash the top of the loaf... seriously, it's not pretty if you forget.

Egg wash (1/2 egg, 1/2 water mixture) the top of your loaf.

Bake in a 350 degree oven for 50 minutes, or until the loaf sounds hollow when you knock on it. I know I sound crazy, but I always knock on my yeast dough.

Allow to sit in the pan for 10 minutes before removing. Slice after fully cooled.

Look at those apple cinnamon swirls... I'm serious. This needs to be French Toast immediately. Sorry, I'd have a post about that tomorrow, but none of the bread survived the night. Better luck to you. Maybe for Christmas morning...

Sunday, November 11, 2012

Chicken Wing Dip Stuffed Shells

I have a final tomorrow. I'm kind of freaking out about it in a way that makes me not want to study. Instead, I want to pull the blankets over my head and pretend that finals are going to go away.

So, I made the week's most time consuming dish tonight... as a study break.


Chicken Wing Dip Stuffed Shells
  •  1 Box of Jumbo Pasta Shell, cooked al dente, even a little under. They'll finish in the oven.
  • 2 Shredded Chicken Breasts
  • 1/2 cup of Frank's Hot Sauce (I cut back on this because Code Boyfriend does not like spicy food, it was still really good)
  • 1/2 cup of Ranch Dressing
  • 4 oz, half of a box of Cream Cheese
  • 1/2 cup of Cheddar Cheese (extra for the top)
 For the sauce:
  • 2 Tablespoons of Tomato Paste
  • 2 Tablespoons of Frank's
  •  1/2 cup of Chicken Stock  
Mix shredded chicken, Frank's, ranch, and both kinds of cheeses in a bowl.

Spoon this mixture into the cooked shells and place into a glass baking dish. The shells can be on top of each other. 

Mix the tomato paste, Frank's and chicken stock in another bowl. Pour this over the shells.

Cover the shells with extra cheddar cheese.

Bake in a 350 degree oven for 10 minutes, until the cheese is all melty and the shells are cooked.


 These were amazing! But so filling. We have over half the pan left with 3 hungry college student eating. I should have cut the recipe in half, keep this in mind if you don't have an army to feed.   

Related: I want to use the jumbo shells to make giant mac and cheese. Maybe for winter quarter....     

Saturday, November 10, 2012

Caprese Stuffed Chicken and Sun Dried Tomato Risotto

Code Boyfriend declared this the best thing he's ever eaten. I take that as extraordinarily high praise.

Our roommate is out of town for an interview, so we decided to have a slightly fancy dinner at home. Code Boyfriend picked up a bottle of wine, and I made this.


Everything was amazing. The chicken was tender, the risotto was amazing (granted, it's Pioneer Woman's recipe, so what do you expect) and the pan sauce was perfect.

Code Boyfriend even found a white wine we both enjoyed that paired well with everything.

Sorry guys, white wine will never be my favorite, but Sweet Walter White tastes like champagne they forgot to carbonate, and I can get behind that.

Caprese Stuffed Chicken
  • 2 chicken breast
  • 1 Roma Tomato
  • 1/2 a cup of Basil
  • 3 Mozzerella String Cheese Sticks
  • Olive Oil
Butterfly the 2 chicken breasts, then lightly flatten with a cast iron pan. Or, if you're all fancy you could use a meat tenderizer, but I just don't have room in my kitchen for one when I can use a mini cast iron pan.

Peel string cheese into a bowl. Mix with the diced roma tomato and chiffonade of basil.

I used this mixture to stuff the chicken breast, placing the seam of the rolled chicken breast down in the pan. I only used half of the stuffing and used the remainder for the sauce.

Place in a 350 degree oven for about 1 hour, until the chicken breast is cooked completely through.

About half way through the cooking process, I poured 2 tablespoons of olive oil over the chicken breasts to keep them moist.

Then I paired it with this sauce.


Caprese Pan Sauce
  • The leftover Caprese food
  • 1 cup Chicken Broth
  • 2 Tablespoons of Heavy Cream
  • 1 Teaspoon Corn Starch
After the chicken is cooked and taken out of the pan and placed on a cutting board to rest, place the pan on the stove over medium heat.

Add all of the ingredients to the chicken drippings, heat and stir until the sauce comes together. Serve over the chicken.


I served this dish with the Pioneer Woman's Sun-Dried Tomato Risotto, which is amazing as is. I didn't change a thing. I have tried her risotto both with and without white wine, and you can definitely taste the difference in the end product without the wine. The flavor just is not as deep.

I highly recommend looking around her blog when you are stuck for meal ideas. She's always very inspirational.

Sunday, November 4, 2012

Breakfast Grilled Cheese

This may be the best idea I've ever gotten from Pinerest.

Simply Cooking made this breakfast grilled cheese, and today, I had Code Boyfriend make me one.

In fairness, he asked me if I wanted eggs for breakfast, and I did. I just wanted them in a grilled cheese.

While Simple Cooking used a fried egg, I'm just not a huge fan of all of that yolk leaking out of the center of my sandwich, so I went for a scrambled egg.

Breakfast Grilled Cheese
  • 2 Strips of Cooked Bacon ( I'm sure ham or sausage would also be tasty)
  • 1 Scrambled Egg
  • Butter
  • 2 Pieces of Multi grain bread
  • Shreded Cheddar Cheese
Butter both pieces of bread and place butter side down on a non-stick pan, over medium heat.
Place about a handful of cheddar cheese on each side of the bread. Allow to melt.
Once the cheese is all melty, add eggs and bacon. Close sandwich. Consume.

Guys, I know you're all like, why is she telling us how to make grilled cheese, but trust me, next time, add eggs and bacon.

You won't regret it.


Saturday, November 3, 2012

Cinnamon Sugar Muddy Buddies

My roommate and I are slightly addicted to pinterest. She found a recipe for Churro Chex mix. When we were looking for a snack, we decided to give it a shot.

About half way through the recipe, I stopped using the recipe. They never stated when to add the powdered sugar to the mixture, and halfway through the mixing, they tell you to move the stick chex to a cookie sheet, and continue to mix.

.... all that did was get my cookie sheet all covered in cinnamon stickiness, while ruining my ability to stir.

Also, it tasted nothing like churros. But! What we ended up with, no one could stop eating. It was sweet and cinnamon-y, and in my opinion, perfect for Christmas parties.

So I will share it with you.

Cinnamon Sugar Muddy Buddies
  • 5 cups of Rice Chex (or really whatever kind of Chex you have, I'm sure it would be good with any kind)
  • 1 bad of cinnamon chips
  • 2 tablespoons of butter
  • 1/4 cup granulated sugar
  • 1 and 1/2 teaspoons of cinnamon
  • 1/2 cup of powdered sugar
 Measure out the 5 cups of chex into a large bowl. Set aside.

Melt the cinnamon chip with the butter in the microwave. Stir to combine, and pour over the chex.

Fold the cinnamon mixture into the chex, until the chex are thoroughly coated.

Combine the cinnamon and the granulated sugar to make cinnamon sugar (I know this step is difficult, try to press on)

Pour the cinnamon sugar over the chex, stirring to coat the chex.

They will still be rather sticky at this point. Sprinkle on the powdered sugar slowly, folding in powdered sugar until the chex are no longer clumping together.

Once they are coated in powdered sugar, they shouldn't stick together anymore and are ready for snacking!

Try not to eat them all yourself, it is a lot of sugar, but trust me. This won't stick around for long.