Showing posts with label Dessert. Show all posts

Monday, January 7, 2013

Carrot Cake Cookies

Merry Christmas and Happy New Year!

I had a very nice Christmas break. Two weeks was not quite long enough to recharge my school batteries, but it was nice to remember what sleep feels like.

It's back to the college grind today, but it's very unsettling to think that I only have 5 months left.

Code Boyfriend and I have huge plans for after graduation, but more on that later.

Right now, I want to show you pictures from my awesome new camera (hooray for Christmas presents!), as well as the cookies I made for the Knitting Club e-board.

I got so busy before break that no one got any cookies! I had to fix that. So now, carrot cake cookies.

They're soft, and cake-y. Just like a carrot cake muffin. But only the top, which is everyone's favorite part anyways.

Doesn't that look good?

I'm so excited to dig in to them at the meeting tonight.


Carrot Cake Cookies
 Adapted from LandOLakes
  • 1 Cup of Butter, softened
  • 3/4 Cup of Brown Sugar
  • 3/4 Cup of White Sugar
  • 2 Eggs
  • 2 and 1/2 Cups of Flour
  • 1 Teaspoon Baking Soda
  • 2 Teaspoons of Ground Cinnamon
  • 1/2 Teaspoon Salt
  • 2 Cups of Shredded Carrots (About 4 Carrots)
Cream together butter and both sugars until fluffy.
Slowly beat in both eggs.
Beat in flour, baking soda, salt, and cinnamon.
Finally, gently mix in carrots.

Place about 2 tablespoons of dough about 2 inches on a baking sheet, lined with parchment or a silicon baking mat. (Please note my awesome new silicon baking mats!)

Bake at 350 degrees for 12 minutes. They won't stay soft if you overcook them. And who wants crunchy carrot cake??


Frost with cream cheese frosting and enjoy!

Saturday, December 22, 2012

The Most Moist Chocolate Cake

3 years ago, when Code Boyfriend's birthday was coming up, I asked him what kind of cake he wanted.

He said he wanted an extremely moist, dense, chocolate cake.

So, I scoured the internet for the most moist chocolate cake and I think I've found it. After making it once, I have never felt the need to look for another chocolate cake.

I've made this recipe at least 6 times, including as Code Boyfriend's birthday cake three years running. He never wants anything else.

I will give you fair warning. Frosting this cake will make you want to cry. Making the cake so moist makes it nearly impossible to frost without getting crumbs in the frosting.

You'll scream, you'll cry, and then... you'll taste it. And all that hatred will go away. 

I think this cake would be great frosted with whipped cream, allowing the chocolate flavor to stand for itself. Code Boyfriend has a very strong attachment to vanilla butter cream.

If you are going to frost with butter cream, make sure it's very soft butter cream. Mine was very stiff and it wouldn't go on nicely. After 45 minutes of struggling with it, I swore I'd use whipped cream next year.

Adapted from Tricia's Kitchen.


The World's Most Moist Chocolate Cake

  • 2 Cups of Sugar
  • 1 Cup of Vegetable Oil
  • 2 Eggs
  • 1 Cup of Milk 
  • 1 Cup of Hot Coffee
  • 2 Teaspoons of Vanilla Extract
  • 3/4 of a Cup of Cocoa Powder  
  • 2 Cups of Flour
  • 2 Tablespoons of Corn Starch
  • 1 Teaspoon of Salt
  • 1 Teaspoon of Baking Powder
  • 2 Teaspoons of Baking Soda
  • 1/2 Cup of Sour Cream
 Combine sugar and oil in a mixer. Add 2 eggs slowly. Add milk, coffee, and vanilla.

Combine flour, cocoa powder, corn starch, salt, baking powder, and baking soda in a separate bowl.

Slowly, incorporate the dry ingredients into the wet ones.

Mix in the sour cream. Make sure to do this completely, or you will have streaks of white in your chocolate cake. 

This batter will be extremely watery. The first time I made this cake, I thought it was never going to bake up. But it does.

Pour into 2-9 inch round cake pans lined with parchment paper.

Bake in a 325 degree oven for 40-50 minutes, or until a toothpick comes out clear.

Seriously, try this cake! You'll never go back!   

Wednesday, November 14, 2012

Chocolate Custard Cupcake Pies

 I told you! I told you I'd get the post about the Chocolate Custard Cupcake Pies up today. And I will.

But I've got two finals tomorrow, one the day after, and a lab report due, so please bear with my briefness today.

The Hooks and Needles Eboard party was a great success. I think I may be able to do this whole leadership thing after all.

It is, however, exhausting...

So, less whining, more pies.

 Chocolate Custard Cupcake Pies
  • 2 Pillsbury Frozen Pie Crusts
  • 1 Batch of Chocolate Custard (I talked about that yesterday--right here.) 
Cut circles of defrosted pie dough slightly larger than your muffin tin.

Push these into a greased muffin tin. 
 
Now, here's where you should not be like me. Poke holes with a fork in the bottom of each of your mini pie crusts, and bake as the packages instructs for a fruit pie.

They bottoms of the crusts will not cook with the custard. I had to finish mine in a frying pan. Don't be like me, pre-bake.

After the crusts come out,  ladle your custard mixture in to each tiny little pie crust.

Place your muffin tin into a roasting pan full of water (or any other large, oven safe dish that your muffin tin will fit into. Be sure to check before you pour the custard to make sure you have something that will fit) and bake at 300 degrees for 35 minutes, or until they jiggle without sloshing.

Bring to room temperature and then stick the entire muffin tin in the fridge.

Once cooled for about an hour, you should be able to take your tiny pies out by running a knife around the edge of the muffin tin and using a spoon to pull the pie out.
I think they came out great... they'd be in better shape if I pre-baked.
Oh well. Lesson learned. They were still very tasty.

Monday, November 5, 2012

"The Best Frosting I've Ever Tasted" Troubles

Today was a last day. Everybody knows about first days: first day of class, first day of college, first day in a new city.

But today was the last day. The last club meeting at which the old president of my college's knitting club would still be a student. The last day of the old guard, finalizing the passing of the torch.

Seeing as the club's membership has exploded and the majority of the members still don't know my name, the very nature of the club has changed, from a group of friends who hung out and knit, to something much larger.

.... And now I have to figure out what the something larger is, before my time comes to have my last day.

But today was not about me. It was about Alyssa. We had pizza and cupcakes to make the meeting feel festive.

As an avid reader and worshiper of the Pioneer Woman's blog, I decided to frost the cupcakes with the frosting she has dubbed "The Best Frosting I Have Ever Tasted".

I've made this frosting before, so I thought it would work out. But something went wrong.

I was about a tablespoon low on granulated sugar, so I substituted powdered. Big mistake.

The frosting began to separate. Maybe that was from the pink food coloring I added, but no matter how long I whipped, it never became homogenous. 

See? Even in the picture it looks a little grainy. That's not the camera, that's the frosting. Don't get me wrong, it still tasted amazing, but it just wasn't what I wanted.

Since the frosting never firmed up and began melting off the cupcakes once I piped it on, I ended up making a batch of normal butter cream and using that to frost the rest of the cupcakes.

I feel like this was my fault. I think I ruined something in this recipe. I don't want to believe that the Pioneer Woman would ever lead me astray.

I've used this frosting for a full cake and things worked out fine. I just think it's meant to be spread, not piped, and generally not fussed with as much as I like to fuss with my frosting.

 I'll try again with this at a later date. For this frosting, it is not the last day.

Friday, November 2, 2012

Cake Vodka Mixed Drinks

I turned 21 this past summer. On my birthday, I went to the liquor store in my town and picked up a bottle of UV Cake Vodka, for pudding shots.

While the cake pudding shots were the favorite at the party, I am also out of them. But I will share the recipe anyways.

But my favorite Cake Vodka drink recipe is very simple.

Cake Cola Shooter

  • 1 shot of Cake Vodka
  • 3 shots, about a half a can, of Root Beer
Stir to combine. Best served cold.

Cake Pudding Shots
Be warned. These taste like vanilla cake batter and should be made with extreme caution.
  • 1 box of Vanilla Pudding mix (Instant, not Cook and Serve)
  • 1 cup of Milk
  • 1/2 cup of Cake Vodka
  • 1 cup of Cool Whip
 Use a hand mixer to combine the pudding mix, milk, and vodka until slightly thickened, then fold in the cool whip. Transfer in to tiny cups, shot glasses, or a giant bowl. Whatever you want to serve it in. The mixture sets up very quickly.

These are awesome frozen. They're like Cake Batter Alcoholic Ice Cream

I hope you guys enjoy these recipes, and explore the wonders that stem from Cake Vodka

Tuesday, February 28, 2012

Biscuit Donuts

Biscuits.. You know, the ones that come in the blue pop can? Well, that thing scares the bejeezus out of me.

It is a loud pressurized pop.. I feel like I'm about to die every time I hear one. Luckily enough for me, loving BF volunteers to open the cans while I cower in the corner.

So this Friday, the gang came over for Fry-Day. It was the end of the quarter, give us a break. We were looking for an excuse to party.

And one of my friends brought over my new favorite card game. I'll review it for you once I get my copy.. It will be here tomorrow..

I digress. Donuts. This post is about donuts. But I have space to ramble because this may be the easiest way to make donuts ever. Yes, I would reckon, the only easier way is to make somebody else do it. But where is the fun in that?

Tube of biscuits and oil. The new Boyfriend in the group thinks that's all you need. He doesn't like sweets... at all.

For those humans reading, I will also suggest you have powdered sugar and milk for a glaze.

Biscuit Donuts

  •  Store bought biscuit dough
  • Some form of oil for frying
  • 1/4 cup of Powdered Sugar
  • 3 Tablespoons or more of Milk
 Now, cut the dough into donut shapes. I used a lid to a soda bottle and a knife to cut out the centers, but for those of you who may actually have a small round cookie cutter, I'd use that. My method was effective but sticky.

Save the centers to make donut holes. Trust me.

Then, carefully place the dough in some hot oil, I used my snazzy new Christmas present - my FryDaddy.

Flip after about 45 seconds. These cook up fast, so keep an eye on them and flip sooner if they are a nice golden brown.

Drain on some paper towels, and mix the powdered sugar and milk to create your glaze.

Once the donuts are cool enough to touch, dip the tops into a bowl of the glaze. When you flip them back over, the glaze will run down the donut.

Try not to eat them all before the party starts! When I did this, people were standing behind me while I fried, stealing the donut holes before I was done.

Such a hit and so easy! I would have more pictures if there weren't 3 hungry college guys in my kitchen.

Saturday, January 21, 2012

Chocolate Sorbet After a Very Long Day

Well, contrary to what every diet ad on tv tells you, getting in shape is hard. Sadly, most of the days I swore I was going to get to the gym, I was exhausted, busy, or just plain didn't want to go. Not a great start, but I hope with time it will get better....

Yeah, I know with time it might get worse, but whatever, at least I'm trying.

My new way of eating is also going very well. The first couple of days were hard, but once I figured out when I needed snacktime (WARNING: Do not approach me if I have missed a snack. It's not pretty) it is going well.

I'm sure all of you read my blog weekly and already know this, but for anyone new, my new way of eating allows me to enjoy dessert once a week. Luckily enough, BF got an ice cream maker for Christmas. :D Soooo many new toys to play with.

Today decided to be the day we needed dessert. Yesterday, BF's flight for an interview got cancelled. As sad as we were about that, we decided to make the most of him being home this weekend. So, I was going to take my car to the mechanic... and it wouldn't start.

The emergency brake was frozen on. Thank you, Rochester.

After calling AAA, I missed both of my classes. I did, however, get a job offer that needs me to be ready for a kick off event tomorrow. Yay, job. Boo, way too much to do this weekend.

On top of that, we had an appointment with an apartment complex, looking for housing next year. I feel like I need to wring out my brain.

So, that's exactly what this is designed to do.

Trust me, if you don't really love chocolate, back away slowly.

Chocolate Sorbet
adapted from the Smitten Kitchen
Makes 1/2 a liter

  • 1 Cup + 1 Tablespoon Water 
  • 1/2 Cup Sugar
  • 6 Tablespoons Cocoa Powder
  • Pinch of salt
  • 6 Tablespoons of Chocolate Chips
  • 1/2 Teaspoon Vanilla Extract
  • 3 Tablespoons of Dark Rum (Not enough to taste, just enough to stop the sorbet from freezing solid)

In a large saucepan, create a simple syrup from the water and sugar. Mix in the cocoa powder and salt. Allow to boil for 45 seconds, and then remove from the heat. Mix in the chocolate chips and allow to melt. Mix in the vanilla and rum. Move this to the fridge and allow to cool.

Spray the pre-frozen bowl of an ice cream maker with nonstick spray. Wipe down with a paper towel. This allows a very small layer of oil to remain, allowing the sorbet to come out cleanly.

Fill the greased bowl with as much of the chilled sorbet mix as you can. Mine only holds half. Oh well, I'll make the rest later and freeze it.

Freeze according to manufacturers instructions. Mine took almost twice the time it was supposed to, so be patient with it.

When the mixture thickens to the point of soft serve ice cream, it's done. You can either move it into a container to freeze for a harder final product, or....

Eat soft serve sorbet. It's good either way.

Enjoy!

It definitely helped turn mine and BF's day around!

Tuesday, December 27, 2011

College Christmas Fudge

I am home for the holidays. And it just passed the year anniversary of this blog.

So, I am going to do a post that exemplifies the stated purpose of Once Upon a College Kitchen. A simple, cheap recipe, that can be made easily, but which is also kick-ass.

Although I have not made this fudge in my college kitchen, I believe this fits the bill.

College Christmas Fudge
  • 3 cups of Dark Chocolate Chips
  • 1- 14 oz can of Sweetened Condensed Milk
  • 1/4 teaspoon Salt
  • 1 teaspoon of the Extract of your choosing (I used Vanilla, but I believe BF would love this with mint)
Yep, that's it. These 4 ingredients will make smoother, tastier fudge than you can get with all sorts of messing around with marshmallow fluff.  

 Start by covering an 8 by 8 pan with aluminum foil. Don't worry about anything else, the foil will come out just fine. 

Melt the chocolate chips until mostly melted.

 Add the sweetened condensed milk and salt, then stir until combined.  


Once combined, allow the chocolate to melt completely. Mix in vanilla and nuts if you would like. I don't like nuts in my fudge.


 Spread fudge into the foil covered pan, then refrigerate for 20 minutes. Cut into little pieces, this is a very rich fudge.

Enjoy! This a very easy way to make fudge. Great for presents. :) 

Tuesday, October 11, 2011

Plum Strudel

No I don't mean apple in that title and no I haven't fallen on my head anytime recently. I just happened to fall victim to a good sale. 2 pound bags of plums, $1.98 each. I happen to love plums and couldn't pass up a bag.

The problem with this is that I really only loved the first pound... and then ended up with a pound and a half of quickly ripening plums sitting on my counter.

After a quick Google search, I started to feel very badly for plums. All of the plum pie recipes I ran across were a little too gourmet to sound appetizing.. Don't pretend you don't know what I mean. There was nothing simple, a tad spicy, a little sweet, and would use a good number of my plums.

So, I worked off of a basic Strudel recipe, changing to based on what I had on hand and what I know to work well with plums. This created a very tasty plum strudel that my knitting club devoured.

Plum Strudel  
  • 2 cups skinned, sliced plums (around 6 plums)
  • 3 Tablespoons of Butter
  • 2 Tablespoons Lemonade (lemon juice works too, but this is what I had)
  • 1 Tablespoon Honey
  • 2 Teaspoons Cinnamon
  • 1/2 Teaspoon Ground Cloves
  • 3 Tablespoons Brown Sugar
  • 2 Sheets of Puff Pastry - defrosted
  • 1 Egg
  • Cinnamon Sugar for dusting
Vanilla Icing
  • 3 Tablespoons of Butter
  • 1 cup Powdered Sugar
  • 1 Teaspoon Vanilla
 Start by peeling and slicing your plums. This is the most tedious part of this. But well worth it. Be careful getting that pit out.

Next, melt the butter in a cooking vessel large enough to contain your fruit.

Once melted, add the plums into the pot, and cook until tender and aromatic. You want them to be a little tender before you move on.

When the plums begin to soften, you want to add your sweet and spicy team. Cinnamon, cloves, brown sugar, honey, and lemonade all go into the pot.  Mix and cook until the plums are soft and a bit golden in color.  Let your filling cool. I hurried this process along by placing the whole dang pot in the fridge.

 Unfold your puff pastry, then refold in half. Make half inch cuts on the folded side. Then fill with half of your plum filling. Seal your ends, and place your newly formed strudel on a baking sheet seam side down. Brush the top of the dough with your egg, and sprinkle with cinnamon sugar. It's nice when things look pretty... Lather, rinse, repeat with the other sheet and the rest of the filling.

Bake according to your package of puff pastry. Watch carefully, mine got a little crispy because my oven is possessed.

Now for the grand finale. The frosting. So simple, so tasty. Melt butter. Add sugar and vanilla. Mix. Thin with water or milk if it's too thick to drizzle. Use a spoon to drizzle onto the strudel. This is the best glaze I have ever used. You'll never go back to using just milk again.

I'm going to take a moment to apologize for the lack of detailed pictures at the end. I was hurrying to finish these, and spaced on taking a couple pictures for you fine folks. Feel free to comment any questions you have, I can clarify anything. I just couldn't wait to share this tasty recipe.

Wednesday, August 3, 2011

White Chocolate Orange Cookies

I made these cookies for my mother's friend's retirement party... twice.

You see, the recipe was supposed to yield 24 cookies, which was waaaay more than I wanted. So I originally cut the recipe in half, for a dozen cookies, in a normal cookie size.

Then I made mini-cupcakes and tiny little lemon cookies. The cookies looked GIANT, which worked out, because cutting the recipe in half was too few cookies... I know it sound like a lot, but these cookies are delicous and bake up fast.

I got the recipe from The Goddess's Kitchen, but the recipe was in grams... I'm in college, I do not own, nor wish to own a kitchen scale. So, here is a fantastic cookie recipe - in cups :)

White Chocolate Orange Cookies
Makes 2 dozen, and you are going to want all 24 :)
  • 1/2 stick of unsalted butter, room temperature
  • 2 cups of sugar
  • 1 egg
  • 3 tsp of orange zest (1 orange)
  • 1 tsp vanilla
  • 2 cups - minus 4 tablespoons of flour
  • 1/2 tsp baking soda
  • 1/4 tsp baking powder
  • 1/4 tsp salt
  • 2 cups of white chocolate chips
Preheat oven to 375.

Cream together butter and sugar.

Add beat in egg, orange zest, and vanilla.

Whisk together all dry ingredients.

 Combine wet and dry ingredients.

Beat in chocolate chips.

Roll into balls and flatten on a cookie sheet.

Bake for 8-10 minutes. Try not to eat them all at once.

Monday, March 7, 2011

Blueberry Cupcake Pies

Winter quarter at school managed to come and go without enough time in my schedule for a blog post.

Than Spring break showed up last week, and with a trip home with the boyfriend, and a major cold, I once again couldn't blog.

Here we are at Week 1 of Spring quarter. A new hope at the end of a long hard winter. In celebration of this, I have decided to show my own attempts at cupcake sized pies. I was inspired by not martha's blog where she made little pies in jars.

I'm in college. I wanted little pies. And I had no jars. So, the internet has exploded with people making cupcake sizes pies, and I tried my hand at it..

I will warn you before you try things out, eating them makes you feel like a giant, and that is addicting.

Blueberry Cupcake Pies


I started by making a batch of my sugar cookie dough. I have never been a fan of fruit pies because they are either soggy on the bottom, or the crust isn't sweet enough on its own. I wanted a strong pie crust, so see my post, A Nice Change of Scenery for the recipe.

I made a batch of the sugar cookie dough...

then cut out circles with a cup. My cups are very large, so I ended up with circles with about a 4 inch diameter, which was perfect for using as the bottom of my crusts.

I pushed these into my muffin tin, after spraying the pan with non-stick spary and baked for 375 degrees for 3 minutes, so when I added the blueberry goodness they didn't get soggy.
I filled these barely baked pie shells full of blueberry filling, (recipe below) and used the scraps from cutting out the crusts to make some cute top crusts.

I sprinkled the tops of the pies with sugar, then the pies were then bakes for 15-20 minutes, until the tops were golden brown, and the filling was bubbling.

Blueberry Filling

  • 1 and a half cup sugar
  • 2 cups of frozen blueberry
  • 2 tablespoons of cornstarch
  • 2 tablespoons of apple juice
  • Half a lemon's worth of lemon juice, about 3 tablespoons
  • Half a lemon's worth of lemon zest

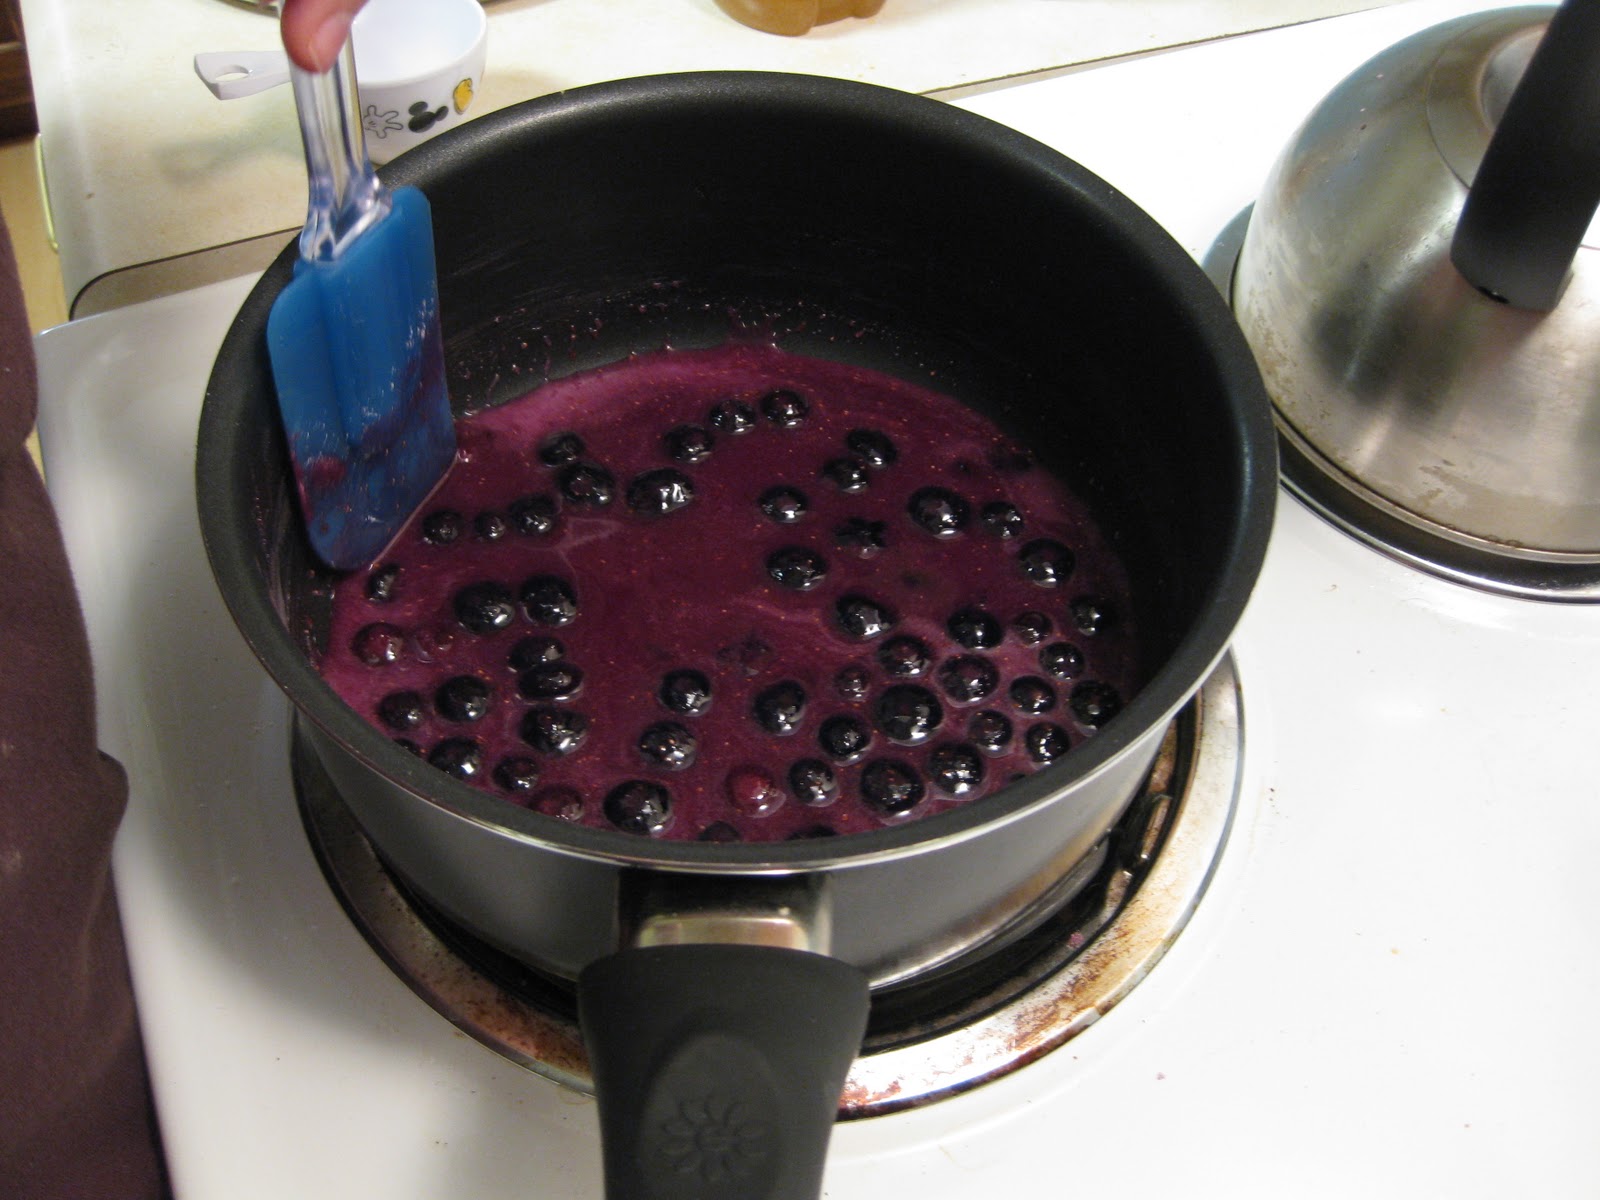
  1. Heat sugar and blueberries in a non-stick pot until the sugar melts completely. It will look like it will never happen. But wait it out. And do not raise the heat of the stove over medium. Molten sugar burns are not fun...
  2. Cook the sugar and blueberry mixture for 2 minutes, then mix the remaining ingredients. Mix and keep heating until the the mixture becomes one cohesive filling.

3.  Let the filling cool and thicken for about 5 minutes until spooning into prepared pie shells and baking.