Showing posts with label Dinner. Show all posts

Friday, January 18, 2013

Loaded Potato Pancakes

I was scrolling through pinterest when I was struck by a fantastic idea.

You know all those hash brown recipes? Why don't they have bacon in them??? What if you loaded hashbrowns like you load baked potatoes?

I know, I know, stroke of pure genesis. I haven't really been this inspired by food in a while.

School kind of kicks the inspiration right out of you.

School is really hard, you know? Senior-itis is an strange thing, but I think mine stems from no longer feeling like I belong on this campus. Now I just feel as if I am waiting for my life to start.

I think college is a time to figure out who you are, but I'm still trying to figure out what to do here once you find out.

I'm a knitting, a baker, and a scientist who loves Basset Hounds, mexican food, and nights in with Code Boyfriend. So what am I waiting for?

While I ponder that question, here is a college recipe. Hopefully it will fit into the rest of my life too.

Loaded Potato Pancakes
Feeds 3 hungry college students
  • 2 Cups of Frozen Hash Browns
  • 1 Cup of Cheddar Cheese
  • 1 Cup of Sour Cream
  • 2 Eggs
  • 4 Strips of Bacon, Crumbled
  • Salt and pepper to taste

Mix the hashbrowns, cheese, eggs, and sour cream in a bowl. Salt and pepper.

Cook bacon crispy, and crumble into the potato mixture. (No idea why this looks like egg salad)

Heat a nonstick skillet over medium heat and form a nice large "pancake" on the bottom of your pan.


Cook over medium heat for about 4 minutes until the underside is golden brown and delicious. Flip, and repeat.

Due to running late to knitting club, and the speed at which these potato pancakes were devoured, I didn't get a pretty plate picture. Sorry about that.

I do highly recommend putting chives in this dish. I would have but Code Boyfriend doesn't eat onion. They would taste exactly like a loaded baked potato if you did.

Roommate informed me that if I made these every night, she would be a happy camper. Great reviews over all, you should try this recipe.

Friday, November 30, 2012

Quick Buffalo Chicken Wraps

This is one of my favorite dinners to make when I am out of time.

I also love to take this for lunch. I bake the buffalo chicken strips in the morning before I leave, then wrap them in aluminum foil. I take a small container of ranch and a tortilla.

I put them all together at lunchtime.

It's so wonderful and filling!

Buffalo Chicken Wrap
  • 5 Buffalo Chicken Nuggets, I use Wegmans, but I'm sure any buffalo strips will work.
  • 2 Tablespoons of Ranch Dressing
  • 2 Leaves of Romaine
  • 1 Multi-grain Tortilla
Oven bake the buffalo chicken strips extra crispy.

Wrap with all the fixin's in a large muti-grain tortilla.

I hope this helps you on a busy night!

Sunday, November 25, 2012

Pesto Panini Bread

When I go back to Colorado, one of the foods I look forward to is a Turkey Pesto Ciabatta sandwich from Mimi's Cafe.

This time, I ordered pancakes when we went to Mimi's. Still good, but not the sandwich I was craving.

I also feel like having school start the Monday after Thanksgiving limits the amount of leftovers I can consume.

So, turkey was on sale at Wegmans, and I picked up a nice little turkey breast.

I wanted to recreate the Turkey Pesto Ciabatta, but did you know ciabatta has to rise overnight?

I didn't. Not enough foresight for that to happen.

So I switched to a panini idea. I wanted to make the bread.

I couldn't find a recipe for bread to use in panini making. I was disappointed.

The Pioneer Woman has never failed me, so I altered the recipe for Blooming Bread from her Pastor.

This bread ends up crispy and delicious, perfect for making into a panini.

Pesto Panini Bread
  • 4 Cups of All Purpose Flour
  • 1 Teaspoon Active Dry Yeast
  • 1 Stick of Butter, melted
  • 1 Tablespoon of Pesto
  • 2 Teaspoons of Salt
  • 1 Cup of Lukewarm Water
Combine the warm water and yeast in the bowl of a stand mixer. Allow to sit for 5 minutes, activating the yeast.

Add the rest of the indgredients and knead for 10 minutes. My mixer, Vera, didn't have any problems with this, but if yours starts to heat up, give it a rest for a few minutes or finish by hand.
Move the dough to a large cast iron skillet and allow to rise for 1 hour. I placed mine on top of the oven I was using to roast a turkey.

Once the dough has doubled in size, it can be moved into a 425 degree oven for 15 minutes, covered in aluminum foil, or with any oven-safe lid. We want to control the browning.

Remove the cover an allow to bake for another 15 minutes.
Cut the loaf into sixths and enjoy filling this with whatever strikes your fancy.

I filled this loaf with tomato, pesto, mayo, turkey and mozzarella cheese. They were amazing!

I pressed them in our little George Foreman grill. No panini maker necessary! 2 cast iron pans work just as well.

Saturday, November 24, 2012

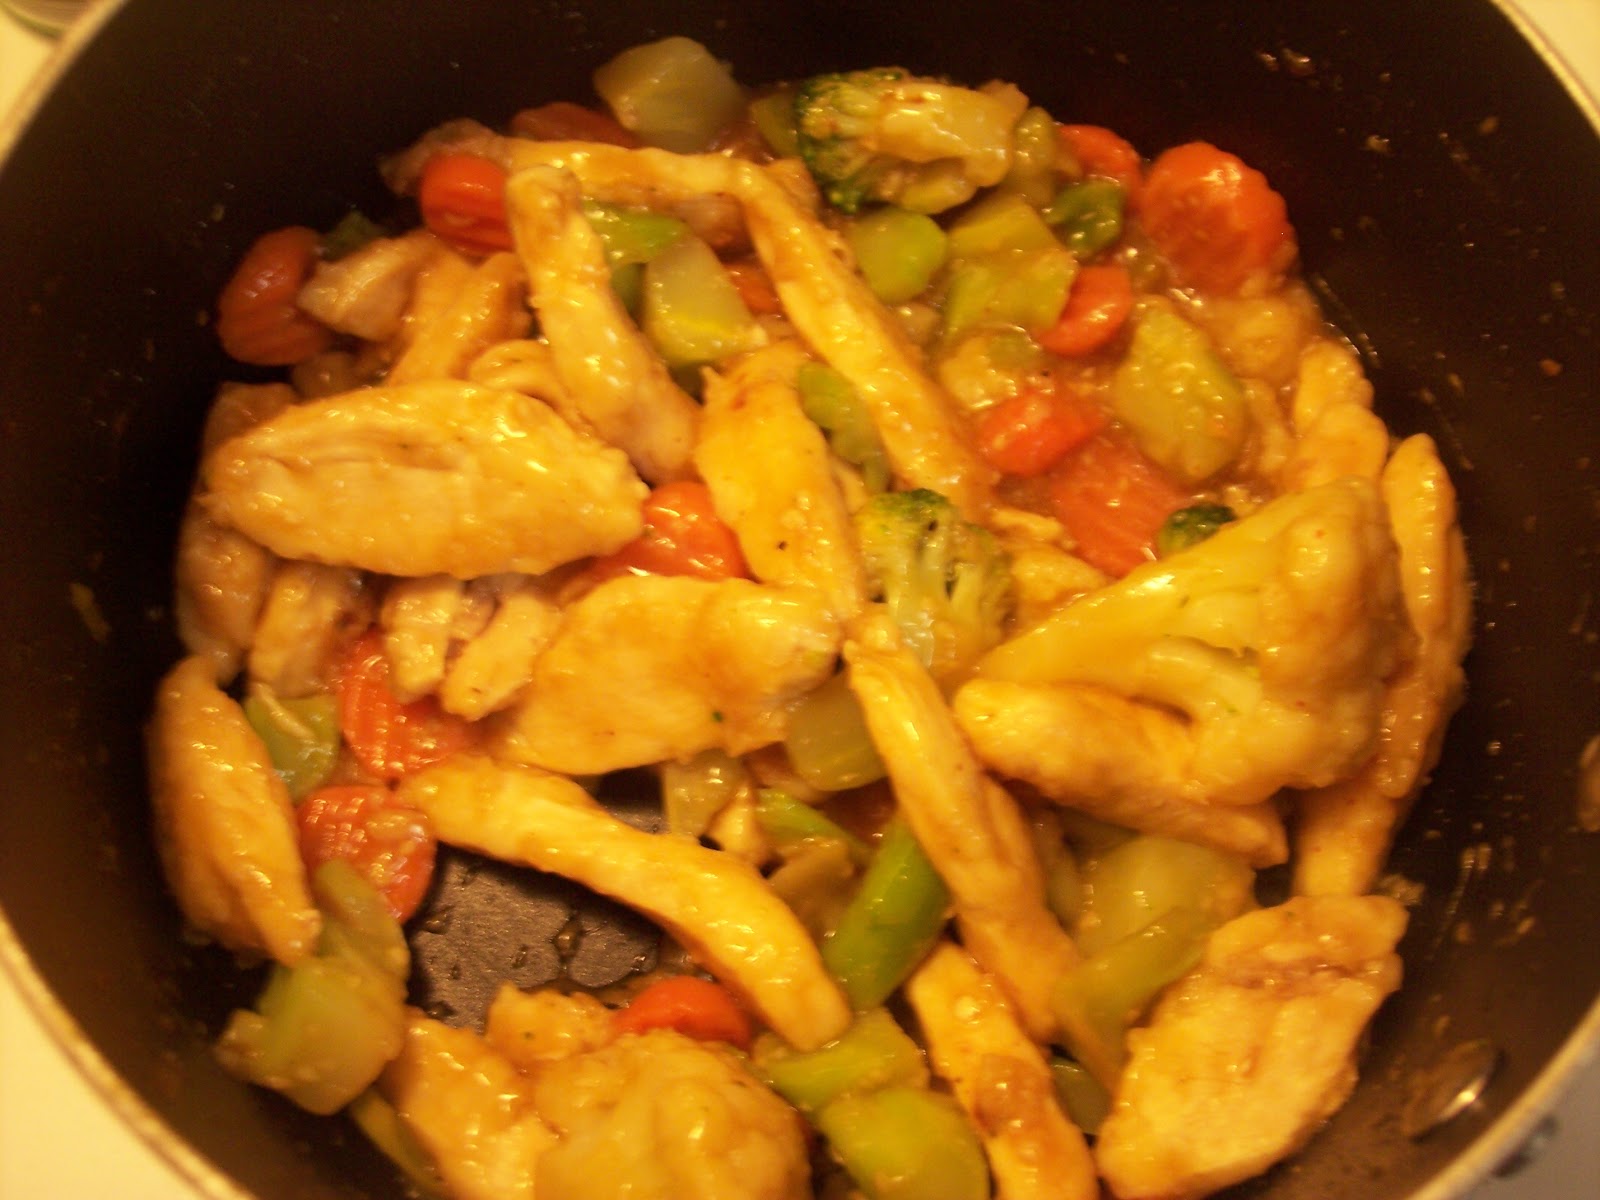
Simple Chicken Stir Fry

I don't know about you all, but I am still feeling full from Thanksgiving.

Code Boyfriend and I have been trying to eat a little lighter since returning home from our vacation.

So tonight, I made a very simple chicken stir fry with brown rice.


Nothing spectacular today. We didn't eat breakfast and grabbed a quick lunch at Wegmans before we did our shopping.

It is full of veggies and easy to switch up with whatever veggies you may have on hand.
Chicken Stir Fry

  • 1 Chicken Breast, cut into strips
  • 1 Clove of Garlic
  • 1 Cup of Frozen Vegetable, I used Broccoli, Cauliflower and Carrots
  • 3 Tablespoons of Teriyaki Sauce -- The Wegman's Teriyaki sauce is very good
  • Olive Oil for the pan
  • 2 Tablespoons of Corn Starch
Coat the strips of chicken with the corn starch and place in a hot pan with enough olive oil in the bottom to prevent sticking. I used a non-stick pan, so I only needed a tablespoon or so.

Allow the chicken strips to brown on one side, almost cooking all the way through undisturbed. This took my chicken about 5 minutes. I used this time to make instant brown rice.

 After the chicken is mostly cooked, add the garlic, frozen veggies, and teriyaki sauce.

Allow the frozen vegetables to cook, about 7 minutes.

Serve over rice, noodles, or whatever strikes your fancy. I do like to serve with rooster sauce. I like the kick.

Friday, November 16, 2012

Grilled Hawaiian Sandwich

I'm done! Fall quarter is finally over for me, as of 11:00 this morning when I finished my last final.

I'm completely exhausted. I love the quarter system, it allows me time to focus on a lot more subjects in a year than I could have in the semester system, but am I ever tired after 10 weeks.

I also leave for Colorado tomorrow. Be ready for some awesome home posts for the next week.

But that also means flying... I hate flying. It's scary. Let's put humans in a metal tube and fling them across the country. That sounds sane.

Oh well. It's how people travel I guess. Code Boyfriend wants me to give train travel a try. What is it with boys and trains? Anyone? I don't get it.

Anyways, with this week being so busy with finals, I tried to plan simple dinners I would feel like throwing together after a day of studying.

So I give you...


Grilled Hawaiian Sandwiches
  • Any bread you'd like, I used slices from an Italian loaf
  • Maple Ham
  • Pineapple Slices
  • Cheddar Cheese
  • Butter (for your grill pan)
This delicious grilled sandwich was created by buttering bread to toast on a grill pan, and adding some cheese.

Then heating the ham on the same griddle and grilling the pineapple slices. The grilling helped heat the ham all the way through and made the pineapple slices sweeter.

Then the hot ham and pineapple were placed on the bread, and the sandwich was grilled on both sides until the cheese was melted and both sides of the bread were completely toasted.

It was amazing. Code Boyfriend said, "These is a surprise in the middle of this ham melt and it's pineapple!"

The pineapple and cheddar combine with the slight sweetness of the maple ham to make a very tasty sandwich.

Monday, November 12, 2012

Lasagna Minestrone

Finals week is off with a vengeance. But I think I did well on the brutal final I had in Developmental Biology and I have some time to recover before the next test.

My roommate, however, had a horrible day. 5 hours of finals, plus work. So I wanted to make a warm and comforting dinner.

Enter Lasagna Minestrone. Imagine the meat-y, cheese-y nature of lasagna, mixed with the broth and veggies from minestrone. It was a goldmine.


Lasagna Minestrone

  • Just under 1 pound of Ground Beef
  • 3 Cloves of Garlic, Minced
  • 1 Cup of Carrots, Diced
  • 1/2 an Onion, Diced 
  • Any other assorted veggies you have that are about to go bad. (It's almost break week, so my fridge is pretty empty, but this would be great with the addition of lots more veggies)
  • 2 Teaspoons of Itailian Seasoning
  • 2 Cans of Chicken Broth, Low Sodium
  • 2 Cans of Diced Tomatos
  • 1 Cup of Tomato Sauce
  • 3 Tablespoons of Fresh Basil
  • 3 Cups of Broken Lasagna Noodles
  • 1/2 Cup of Parmesan Cheese
  • 1/2 Cup of Mozzarella Cheese
 In a large pot, brown ground beef alongside all of your veggies and garlic. 

Once the meat is browned, mix in the broth, tomatoes, tomato sauce, basil, and itailian seasoning.

Let simmer for 20 minutes.

Add bite sized pieces of lasagna noodles. Make the pieces slightly smaller than bite sized, as they will swell up during cooking.

Simmer until the noodles are thouroughly cooked.

Add cheese. Mix until the cheese combines with the soup broth.

Serve and enjoy.

Sunday, November 11, 2012

Chicken Wing Dip Stuffed Shells

I have a final tomorrow. I'm kind of freaking out about it in a way that makes me not want to study. Instead, I want to pull the blankets over my head and pretend that finals are going to go away.

So, I made the week's most time consuming dish tonight... as a study break.


Chicken Wing Dip Stuffed Shells
  •  1 Box of Jumbo Pasta Shell, cooked al dente, even a little under. They'll finish in the oven.
  • 2 Shredded Chicken Breasts
  • 1/2 cup of Frank's Hot Sauce (I cut back on this because Code Boyfriend does not like spicy food, it was still really good)
  • 1/2 cup of Ranch Dressing
  • 4 oz, half of a box of Cream Cheese
  • 1/2 cup of Cheddar Cheese (extra for the top)
 For the sauce:
  • 2 Tablespoons of Tomato Paste
  • 2 Tablespoons of Frank's
  •  1/2 cup of Chicken Stock  
Mix shredded chicken, Frank's, ranch, and both kinds of cheeses in a bowl.

Spoon this mixture into the cooked shells and place into a glass baking dish. The shells can be on top of each other. 

Mix the tomato paste, Frank's and chicken stock in another bowl. Pour this over the shells.

Cover the shells with extra cheddar cheese.

Bake in a 350 degree oven for 10 minutes, until the cheese is all melty and the shells are cooked.


 These were amazing! But so filling. We have over half the pan left with 3 hungry college student eating. I should have cut the recipe in half, keep this in mind if you don't have an army to feed.   

Related: I want to use the jumbo shells to make giant mac and cheese. Maybe for winter quarter....     

Saturday, November 10, 2012

Caprese Stuffed Chicken and Sun Dried Tomato Risotto

Code Boyfriend declared this the best thing he's ever eaten. I take that as extraordinarily high praise.

Our roommate is out of town for an interview, so we decided to have a slightly fancy dinner at home. Code Boyfriend picked up a bottle of wine, and I made this.


Everything was amazing. The chicken was tender, the risotto was amazing (granted, it's Pioneer Woman's recipe, so what do you expect) and the pan sauce was perfect.

Code Boyfriend even found a white wine we both enjoyed that paired well with everything.

Sorry guys, white wine will never be my favorite, but Sweet Walter White tastes like champagne they forgot to carbonate, and I can get behind that.

Caprese Stuffed Chicken
  • 2 chicken breast
  • 1 Roma Tomato
  • 1/2 a cup of Basil
  • 3 Mozzerella String Cheese Sticks
  • Olive Oil
Butterfly the 2 chicken breasts, then lightly flatten with a cast iron pan. Or, if you're all fancy you could use a meat tenderizer, but I just don't have room in my kitchen for one when I can use a mini cast iron pan.

Peel string cheese into a bowl. Mix with the diced roma tomato and chiffonade of basil.

I used this mixture to stuff the chicken breast, placing the seam of the rolled chicken breast down in the pan. I only used half of the stuffing and used the remainder for the sauce.

Place in a 350 degree oven for about 1 hour, until the chicken breast is cooked completely through.

About half way through the cooking process, I poured 2 tablespoons of olive oil over the chicken breasts to keep them moist.

Then I paired it with this sauce.


Caprese Pan Sauce
  • The leftover Caprese food
  • 1 cup Chicken Broth
  • 2 Tablespoons of Heavy Cream
  • 1 Teaspoon Corn Starch
After the chicken is cooked and taken out of the pan and placed on a cutting board to rest, place the pan on the stove over medium heat.

Add all of the ingredients to the chicken drippings, heat and stir until the sauce comes together. Serve over the chicken.


I served this dish with the Pioneer Woman's Sun-Dried Tomato Risotto, which is amazing as is. I didn't change a thing. I have tried her risotto both with and without white wine, and you can definitely taste the difference in the end product without the wine. The flavor just is not as deep.

I highly recommend looking around her blog when you are stuck for meal ideas. She's always very inspirational.

Tuesday, November 6, 2012

Gringo Chicken Taquitos

Today was one of those days where I look at the clock and wonder where the time went.

It's the last week of class of the quarter, so I've been preparing for 3 tests and readying a lab notebook.

This is a great recipe for those, oh crap, I didn't plan dinner and it's 5:30 kind of days.

Also, we didn't make it to the grocery store this week. Not only did we not have dinner plans, I was out of coffee this morning. It was not a good way to start the day.

But look how great they turned out.


I must admit though, these were made in New York state, and I just don't have access to some of the more traditional things for taquitos. I'm also way too lazy to pull out my frier on a Tuesday night.

But they are still tasty, creamy, and crunchy, as well finished quickly, so I was happy with them.

But they're not traditional, so I've dubbed them "gringo".

Thank you, Code Boyfriend, for the action shots.

Gringo Chicken Taquitos
  •  2 Chicken Breasts, cooked, or rotisserie chicken meat
  • 1/2 a Brick of Cream Cheese (4oz)
  • 1 Can of Green Chilies
  • 1 cup of Shredded Cheddar Cheese
  • Cooking Spray
  • Tortillas
First, shred your chicken. I do this in my KitchenAid with the paddle attachment, but you can also shred the chicken by hand, and mix together yourself. But it won't be such a quick meal.
Then add your can of chilies. I tend to just keep the mixer running on low while I toss things in the bowl.
Then add your cream cheese.

And your regular cheese. This completes the awesome chicken filling. This is also where my apartment become divided...

Traditional taquitos are made with corn tortillas. I almost always prefer corn tortillas anyways, so this works for me. But Code Boyfriend and Roommate loudly disagree with this preference. I end up filling both kinds of tortillas with about 2 tablespoons of filling, and then rolling.

But be warned, the flour ones aren't really taquitos, they're flautas. I get very cranky about that. But don't listen to me. They're good both ways, and I'm a grump this week.

Next, put every one on a cookie sheet, spritz with cooking spray, and place in a 400 degree oven, for about 7 minutes, or until the edges get crispy.


I have the world's least reliable oven, so your times may be radically different. Just watch them. They brown up fast. Don't say I didn't warn you.


I serve with salsa (weak, sad pathetic salsa that is masquerading as "hot" in New York) and sour cream.

I always make a bunch of extras and freeze them. Way better than any other frozen taquitos I've ever had. Just reheat in the oven and enjoy!

Monday, April 2, 2012

Very Pinteresting...

Well, it's been a very busy couple of weeks. I know that's no excuse and that if I want a following for my blog I should update.

I'm sorry. School happens. Life happens. And now I am sick. Which, while stops me from being able to completely focus on my Biochemistry of Plants studying.

In my daily travels, I have found a new addiction. Pinterest.

Pinterest is a wonderful place to find dinner ideas, at least that's mostly what I use it for. I frequent the Food and Drink category, on the look out for tasty things. Do be warned. Everything looks tasty. Pinterest has lead me to some very amazing blogs, which I will now show you.

English Muffin Bread : onegoodthingbyjillee - I have a loaf sitting on my counter as we speak. It will not be there for long.

Chicken Gyros : The Girl Who Ate Everything - These were so wonderful we made them twice in 2 weeks. I have a very picky college crowd on my hands. That rarely happens for anything that isn't pizza.

Chicken Tortilla Casserole : Eat Better America - This did not turn out pretty, but boy was it tasty. I used a can of Rotel instead of chopping up tomatos and threw in some frozen corn. Very good.

I feel like Pinterest gives everyone a unique oppurtunity to share the awesome things they find on the internet with people who are looking to do the same sort of awesome things. Let's face it, all of my facebook friends could care less what cool recipe I found online, but I feel like the people at Pinterest do. I hope you check out some of the links as well as Pinterest.

Follow Me on Pinterest

Tuesday, September 20, 2011

Potato Tomato Omelet: Fast, Delicious Dinner for One

I have this horrible hatred of cooking dinner for myself, so many nights, I end up with toast and Nutella. While this is a tasty snack, I don't believe to could be considered dinner or filling...

Last night, like many other nights, I found myself beginning to think about dinner a little too close to the time I was supposed to be somewhere else. Say what you will about my time management skills, but if I'm not hungry, I forget to plan ahead...

So I had about 30 minutes to cook a tasty and filling dinner, scarf it down, and walk out the door to be at my Knitting Club meeting on time.

Enter the delicious omelet. The key here is to prepare this dish in the most efficient way possible. I have some terrific hints for that.

Potato Tomato Omelet (One Person, One Pan Meal)
  •  Cooking oil of some type
  • 2 Eggs
  • 1 small Red Potato, or half of a large one.
  • Diced Tomato (I used half of a Roma, but whatever you have on hand veggie wise works nicely)
  • Cheese of some sort (I actually had shredded on hand, but there is no shame in using sliced, it gets the job done)
  • Seasoning. (I used salt, pepper, Emril's Essence, and chili powder)
Start by adding enough oil to the smallest pan you have to cover the bottom, and place on to medium heat. I used my fantastic 6-inch cast iron. :)

Then, peel your potato.


This is the very pivotal part of this recipe. Using the potato peeler, slice the potato into thin, chip-like slices. This will allow the potatoes to cook quickly and evenly.

Place your thin potatoes in your now hot pan, and toss with the seasonings.


Make sure you are liberal with your seasonings, because they will be flavoring your eggs as well.


While your potatoes are cooking up, dice the tomato or prepare your other veggies. (Cooked bacon or another meat you have around is also a very tasty addition.)

Beat 2 eggs in a separate bowl.

When your potato layer is soft and thoroughly cooked, drop your temperature to medium-low, and pour your eggs on top and then sprinkle the top with your tomatoes and cheese. (Sorry about the blur, I really was late...)

Once the bottom of the omelet has begun to solidify, place under your broiler at 500 degrees.

Watch carefully, these eggs will go from undercooked to overcooked very quickly.


But you do have a few minutes, so clean up your kitchen! Trust me, your roommates won't be very happy to come home to this...
....no matter how in a rush you are.

One your eggs become solid and puff up a tad, it's time to de-pan.


Try not to take it too personally if it doesn't slide out like it does on tv. Egg yolk is protein and protein is sticky!

Now enjoy a tasty, quick, one person dinner while the pan soaks. :)

Thursday, January 6, 2011

Chicken Cordon Bacon

A.K.A The best thing that could ever happen to chicken breasts.

I am once again back to the grind of New York life, the hours of school work and trying to throw together dinner for the boyfriend and myself at 6 hours of lectures.

But tonight, something wonderful happened. I had an odd craving for Chicken Cordon Bleu, and while perusing my cabinet I lacked ham but found bacon. I deemed this to be porky enough and began to create what my boyfriend dubbed Chicken Cordon Bacon.

Granted, it did take several more ingredients than a typical college kid has lying around the apartment, but the beauty of this dish is that it can be made with whatever happens to be in the cupboard that day.

So I started out on the stove top, in my beloved cast iron skillet (trust me, that pan can do anything) melting a little bit of butter. Just enough so the chicken doesn't stick. Go with what you feel.

While that's melting into pools of goodness, I CAREFULLY trimmed the chicken breasts, and sliced them almost in half horizontally. My goal here was to butterfly the chicken breast, so it can be opened like a book and hide all sorts of fun things inside. Don't cut too far because A) it will be very difficult to keep your cheeses on the inside, and B) that's where your fingers are!

Once the chicken was opened like a book, I began to fill it with cheese, something any good college fridge should have.  (I mean really, how are you making grilled cheese and nachos without it?)

I used a combination of White American (boyfriend likes it on his sandwiches, there is no shame in using slices cheese here), shredded cheddar (aforementioned nachos), and Parmesan.

Then season, with whatever you have around. I used salt, pepper, oregano, and some mustard powder, but the dish will be just as tasty if all you have available are salt and pepper packets "borrowed" from on campus.

Then I closed my chicken books. Now, the fun part. I wrapped each chicken breast with a strip of raw bacon. This kept both the chicken book closed during cooking and adds delicious bacon-y flavor the the cheese filled chicken.

I sprinkled my chicken with a very little bit of bread crumbs. This isn't vital, but I think it added a nice ending color and crunch.

I then transfered the bacon wrapped chicken to the skillet of melted butter, moved that into the oven, and baked the chicken at 375 for 35 minutes. Make sure your chicken in cooked all the way through before consumption!

I topped my chicken off with a very quick and easy sauce, that everyone should be able to make.

College Béchamel Sauce - Best over Chicken Cordon Bacon


2 tablespoons of Butter
1 and a half tablespoons of Flour
3/4 of a cup of Milk
A pinch of Italian Seasoning
A pinch of "Emeril's Essence"(I bought mine in a bottle, but it can be made)
Salt and Pepper
1 Tablespoon of Butter

Melt the 2 tablespoons of butter in a sauce pan and mix in the flour. If it looks doughy, that can be fixed when you add the milk, but this should be a glue-y looking mixture.

Add the milk, and mix throughly. This might take some work to get everything incorporated. Trust me, your work will be rewarded.

Once the milk looks like it is beginning to thicken, add all spices and mix. Taste the sauce. Add spices to taste.

Turn off sauce once seasoned, stir in the last tablespoon of butter. This will give the sauce a nice consistency and sheen.


A picture of the finished product, originally taken by my boyfriend to send to a friend, to gloat about his bacon wrapped dinner.